Tuesday, May 12, 2009

TWD: Tartest Lemon Tart
If I had to choose one single word to describe this tart, it would be intense. This has got to be the most lemony lemon dessert I've ever put in my mouth. If you don't like lemon at all, don't touch it. If you like lemon, a little, give it a try...it'll make you love lemon. If you already love lemon...make one right now! It's fantastic! This week's recipe was chosen by Barb, who has a great blog called Babette Feasts. Barb, thanks for picking something non-chocolatey!
There were lots of concerns from my fellow TWDers this week about the possibility of some bitterness, because this recipe uses the whole lemon. Yes, everything! (Well, except the seeds.) Some folks encouraged us to just go for it, just seeding the lemon, chopping it up, and throwing it in the blender, bitterness be darned. Other folks suggested boiling the lemon to get a little bitterness out. Still others suggested zesting the lemon, cutting away the pith, then throwing the zest and lemon wedges into the blender. I, personally, feared the bitterness. So I joined the group who spent a little extra time zesting the lemons, seeding them, cutting away the pith, then putting the zest, wedges, and juice in the blender. And, miraculously, there was no bitterness at all!
Other folks had some issues with the filling not setting up, or boiling over in the oven. Another miraculous event: no boilage, and it set up perfectly!
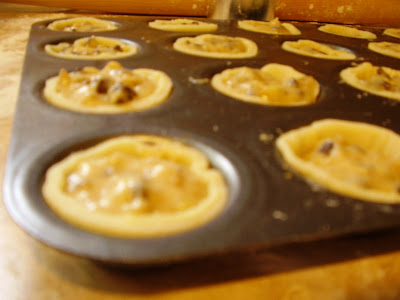
Now, let me tell you my issues. The flavor was fabulous! However, I have a heavy hand with doughs. I like kneading. And I'm forceful. Those are two things that Dorie says we shouldn't be with her shortbread crust! I forgot that until I had jammed that darn crust into the edges of my pan and pressed and pressed and pressed to make it level. I've done that twice now. With the Chocolate Cream Tart and now with this one. I think I've learned my lesson, though. The dough was good, but it wasn't that sandy, shortbready texture I knew it should be. I'll behave myself with my next tart. My final issue: I need a tart pan! I've used a pie pan and this pan, whatever it was, and it's just not the same. I'm not getting the fluted edge, and I can't pop the tart out for pretty pictures. (The tart pan will go on my wish list. However, a new house is first on my wish list, so once that's built, maybe I can get me a tart pan!)
If you're a lemon-lover, definitely make your way over to Babette Feasts for the recipe. You won't be disappointed!

Sunday, May 10, 2009

Happy Mother's Day!

For Mother's Day, my stepdad, sister, and I put together a delicious meal for Mom after church today. She requested ham, one of her favorites. Chet made his mom's famous rolls and some macaroni salad, I made a Bluegrass salad, Dorie's Tall and Creamy Cheesecake (mom LOVES cheesecake), and Dorie's Tartest Lemon Tart (it's our assignment for this Tuesday). We had quite the feast...we were all gluttons. And I thought I'd milk the meal for all it's worth and use some of the components as posts here on The Sweet Life. By the way, in the picture above, my sister Allison is on the left, Mom is in the middle, and I'm on the right.
Let's get down to business with the Bluegrass Salad, recipe courtesy of my in-laws. Let's start with the salad components. Who shall we invite to this party?

You'll need a couple of hearts of romaine, (maybe you've also got some baby greens from your husband's uncle's garden...if you do, they'd be great), walnuts lightly toasted in butter, some sweetened dried cranberries, a couple of nice pears, and feta cheese. The recipe really calls for blue cheese, but Mom doesn't really care for it, so we're going with feta on this one. We're gonna need some dressing, too. Let's see what we can come up with...

We'll need some extra virgin olive oil, some rice vinegar, balsamic vinegar, and some Splenda. You'll need to whisk it all together real good, and you've got a fantastic dressing! Toss all of your ingredients together, and you'll have one dynamite salad!
Here's the recipe if it sounds like something you'd like to try. I highly reccommend it! It's fabulous!

Bluegrass Salad
Recipe Courtesty of Earl Orr


For the Dressing:
1/2 cup extra virgin olive oil
1/4 cup rice vinegar
1 tbs. balsamic vinegar
5 pkg. artificial sweetener (if this freaks you out, feel free to sub regular sugar)


Whisk all the ingredients and set aside.

For the Salad:
2 hearts of romaine, chopped

Walnuts, toasted in butter (use as much as you like)
Sweetened dried cranberries (use as much as you like)
Blue Cheese (as much as you like; I used feta instead, which is good, too)
2 D'Anjou Pears, chopped

Mix all ingredients. Top with dressing and mix well to combine. Enjoy!

Thursday, May 7, 2009

Thrifty Thursday!
Behold...the banana! In my opinion, nature's perfect fruit. Perfectly portable for a nutritious snack. Loads of potassium, to prevent those pesky leg cramps! A low GI food...perfect for diabetics. And you know those boxes of 100-calorie snacks you can get at the grocery...those little packages of tiny cookies that are really just enough to make you mad, not satisfy a craving? Who needs those, when you've got a banana?! See those bananas up there? Each one of them is just about 100 calories. And you can take it wherever you go! Heck, I tote one to work with me on most days!
I bet you're trying to figure out where I'm going with this. First, bananas are pretty thrifty in and of themselves. You can buy them all day, every day for 50-something cents a pound, and lots of times even cheaper than that! Second, they're really versatile...there's lots you can do with a banana. You can just eat a banana plain for a snack. But there's not much better than a banana slathered in peanut butter. You can slice it on top of your cereal to help get in those 5-9 servings of fruits and veggies you need to stay healthy! Make banana pudding! Slice one and put it in a fruit salad! Take good Jell-O and ruin it by floating banans in it! But here's the best thing of all...wait until they go WAAAAAAAAAY ripe (like almost black), and make the best quick bread in the world...Banana Bread! I'm going to confess something right now that I'm not proud of. I used to throw away over-ripe bananas. You see, David (who is a pickier eater than me, though neither of us is picky at all), won't eat bananas. So I buy a bunch of bananas and always have 2 or 3 that I haven't eaten by the time they reach that point where they're really not fit to eat. And I used to throw them away. What was wrong with me? I don't know what caused it, but one day I had an ephiphany! Freeze the blasted things so you'll always have them ready for banana bread! DUH! So here you go...the thriftiest part of my Thrifty Thursday post:
Now, I'm always ready for banana bread! Or banana pancakes! The possibilities are endless! Since my ephiphany, I've even been known to purposely buy those "Bargain Bananas" at Kroger that are 30 cents a pound (they had some today, but I resisted temptation), because they're in that in-between stage...not good enough to eat plain, but not rotten, either. I buy 'em up, bring 'em home, give 'em a good mash, shove 'em in a bag, and freeze 'em! YUM!

Tuesday, May 5, 2009

It's Recipe Request Time!
Yep, it's Tuesday, so that means it's time for Tuesdays with Dorie, right? Kind of. Except I chose not to participate this week. You see, this week, Megan of My Baking Adventures chose the Tiramisu Cake, which looks really great! But I just wasn't feeling Tiramisu Cake. I love tiramisu, but I just couldn't have a whole cake sitting around. I know...I could have halved the recipe, made cupcakes, etc., etc., but I just wasn't feeling it. But I am feeling up to the Tartest Lemon Tart for next week. Pardon me for a moment...Hey Mom--do you like lemon desserts? (I'm thinking we might have it as part of Mother's Day celebrations.)

Let's get on with the subject of this post, though. My good friend Jessi emailed me the other day to ask for my recipe for the Black Bean and Corn Salsa I took to the Derby Party on Saturday. I believe her beautiful daughter Sophie has a thing for chips and salsa. I told her to check my website for the recipe...so here I am! I was thinking that this might be one of my weekly features on The Sweet Life. The problem is, I don't know if enough people who have had my cooking read my blog. We'll just see how it goes.

Anyway, back to the Black Bean and Corn Salsa. It's super easy. It's the short cut version.
Here's what you'll need:frozen corn, black beans, a can of diced tomatoes, cumin, lime juice (I know...it should be squeezed from a real lime, but I was in a pinch), some finely chopped red onion, and cilantro.

If you're afraid of cilantro, please try it. I know a lot of people who have said that cilantro is vile. I think it's a little bit of an acquired taste, but the recipe really needs it. If you're new to cilantro, just use a little bit...baby steps, you know. The recipe calls for 2-3 tablespoons. I don't know what mine ended up being after I chopped it. I just eyeballed it.
Shortcut Black Bean and Corn Salsa
Adapted from a recipe from justcallmetoni at Recipezaar.com
1 can diced tomatoes
1/2 cup frozen corn
1/2 cup black beans (rinse 'em and drain 'em, people...I can't be responsbile for your hypertension!)
1/2 of a red onion, finely chopped
1 jalapeno, finely diced (I left this out. I am a wimp. Feel free to heat it up if you like!)
2 Tbs. lime juice (preferably fresh squeezed, but I won't judge. I used the canned stuff.)
1/2 tsp. cumin
2-3 Tbs. cilantro, finely chopped

Mix all the ingredients together. Refrigerate for at least an hour, then adjust the seasonings to suit your tastes. Serve with tortilla chips, veggies, or whatever floats your boat.
There you go, Jessi and Sophie! I hope you enjoy it!
And for the rest of you...if you'd like the recipe for something I've made and taken to a party, family function, or just a regular ol' meal, let me know! It might be a good post on The Sweet Life!

Monday, May 4, 2009

Stuff You Need
This is the post that almost wasn't! I've spent the last 45 minutes or so on my hands and knees scrubbing my filthy bathroom floor with a toothbrush, and I really wasn't in the mood to blog. You see, we live in a house that's probably sixty years old, and I think the original tile is in the bathroom. It's white tile with white grout. Is there a sane person in the world who thinks it's a good idea to put white tile with white grout in the bathroom? I can't imagine anyone would think that's a good idea! Anyway, it gets all cruddy looking, and I can't stand it! I'm no clean freak by any stretch, but it was getting to be a little much. Butanyway...I've got to keep my 5 or 6 readers coming back, and if they don't get their "Stuff You Need" fix, I can't imagine that they'll be able to go on!
So here we go...what do you need this week?
Knives, my friends...and good ones.

Above, you'll see the knives I use most often in my kitchen (except I forgot one). You don't have to go out and buy Wusthof knives in order to be a success in the kitchen (although that would be nice!), but a good set of knives will go a long way in making your life easier. The top two are the ones I use 99% of the time. They're my two santoku knives, and they're the workhorses of the Orr kitchen. When I've got serious chopping to do, that's what I reach for. For a long time, I only had the big one, but I got the smaller green one from Pampered Chef (my stepsister is a consultant, and they've got some nice stuff). I didn't really think I needed two santoku knives, but it's been so nice to have them! Now, I use the big one mostly on big stuff (watermelons, canteloupes, etc.), but that's not to say that you can't use it for the everyday stuff, too. It's just that the little green one is easy to handle when I'm chopping onions, mincing garlic, etc. If you don't have a santoku knife, get one...really.

Next, we have the large serrated knife. You just can't cut a nice loaf of bread with the santoku knife...it gets all smashed and ugly. Serrated is the way to go, especially for bread. (I don't have much more to say about it.)

Then, we have the sharpest knife (currently) in my arsenal. I guess it's a chef's knife...I really don't know. This is my meat-trimming knife. I think it's really a pretty all-purpose knife, but that point really helps to get in there and trim up chicken, beef, etc.

Finally, the tomato knife. And no, it's not just for tomatoes. I really like this knife, and I'm not sure why. I really like the sharp point...you can get things started with that. It's David's go-to knife for cutting up oranges. (And while I'm on the subject of cutting up oranges, how do you eat them? I grew up just peeling them and eating the wedges out of hand. David and my inlaws always cut an orange, then eat the flesh away from the peel. The first time I sat and peeled and orange and ate the wedges out of hand, they looked at me like I had two heads. Of course, I probably looked at them like they had two heads while they were slicing away at the oranges. Which way do you prefer?) Let's get back to the subject at hand...the tomato knife is essential for slicing those juicy home-grown tomatoes that are still warm from the sun! That sharp point cuts through the thin, but tough skin without smashing the tomato's flesh, which gives you perfect tomato slices. It's a must-have.

My last little knife (that I forgot to get out) is also from The Pampered Chef. It's a little paring knife, and I think they cost less than a dollar each. I got mine as part of a wedding shower gift from David's cousin Virginia Ann. That knife is sharp! It's great for peeling an apple or slicing potatoes. And for what they cost, there's no reason not to have a couple!

So there you have it...the stuff you need for this week. Really, ya'll...you need good knives.

Saturday, May 2, 2009

Talk Derby (Pie) To Me!
So, unless you've been living under a rock, you're aware of the fact that today was the running of the 135th Kentucky Derby. And here in Kentucky (very near Louisville), it's kind of a big deal. One of the many culinary Derby traditions (second only to the mint julep), is the Derby Pie, which you may not know is actually copyrighted by Kern's Kitchen. They are the only folks who can make "Derby Pie" and the recipe is a closely guarded secret. But that doesn't stop us from looking for a copycat! There are tons of Derby Pie recipes out there, and the best one I've ever had is the one my stepmom, Theresa, makes. But I forgot to get her recipe in time to use it for the Derby Party that I went to today. I checked around on the Internet last night and found a pretty good substitute. I've learned from experience that when people are at a party where they'll be grazing on food all day long that they're not going to sit down and eat a whole piece of pie or cake. If you take a whole pie or cake to one of these type events, it's going to look great, but it will just languish on the counter while people eat chips or cookies. So I decided to make mini-Derby Pies. Little two-bite pies, if you will. Of course, I used Dorie's pie crust recipe, because it's unbeatable.
Here's a shot of my floury countertop with the mini-muffin pan lined with Dorie's pie crust. The first batch I made was a wreck. They tasted great, but I was still working out the kinks. By the time I got this batch done, I was on fire. The secret was to roll out the pie crust super-thin...like 1/16" thick, then to use only a teaspoon of the filling. That gives you pretty much the perfect mini-pie crust to filling ratio. On the first batch, the crust was still kind of doughy and there was too much crust for the filling. But this is perfect.
Here are the filled mini-crusts. The filling kind of reminds me of chocolate chip cookie dough. It's good straight off the spoon. YUM! I was hoping you'd get a better shot of the chocolate chip and walnut chunks peeking out of the dough, but not so much. I really need to work on my food photography skills. But at least I was cooking in the morning on this project, instead of starting at about 8:30 at night.
Here's a shot of a portion of the mini-Derby Pies. The later batches turned out much better...they actually looked like mini-pies instead of muffins.
I made 6 dozen of these Derby pies this morning. I just realized that. I thought I made 3 dozen. Then, while I was adding these pictures, I realized that my mini-muffin tin holds 24 mini-muffins. I filled up the muffin tin 3 times. That's SIX DOZEN DERBY PIES. Holy crap. I came home with about a dozen and a half. I think they were a hit!

So, for those of you who have never had had a Derby pie...are you wondering what they taste like? Luckily, at the party, we had two of the real deal Derby Pies...from Kern's Kitchen. I had one of my three loyal readers, Jason, do a side-by-side taste test. He said that the Kern's Kitchen pie had more of a "pie filling" texture, which I would describe as a chess pie-type filling with chocolate chips and walnuts. He said my mini-pies had a kind of "chocolate-chip cookie dough" texture, which he said was more desireable. So I don't know which would win in a throwdown...probaby Kern's real Derby Pie. But Jason's pretty partial to sweets of any kind. But to only come home with a dozen and a half of the original 6 dozen pies tells me I'm on to something! Want the recipe?

Derby Pie (Shhh...Don't Tell Kern's Kitchen!)
Adapted from a recipe by Starry News from Recipezaar
1/2 cup butter, melted
1 cup sugar
1/2 cup flour
2 eggs, beaten
1 teaspoon vanilla
3/4 cup chocolate chips
3/4 cup walnuts
Enough crust for a 9-inch pie
Combine the butter, sugar, flour, eggs, vanilla, chocolate chips, and walnuts. Mix well.
Roll out pie dough to 1/16" thickness and cut with a small biscuit cutter to a size that will fit your mini-muffin tin. Fill each mini crust with 1 tsp. filling. It will look skimpy, but I promise, it's just right. Bake at 350 degrees for 20 minutes, turning once during baking. Serve slightly warm so the chocolate chips will be melty, but they're really good at room temperature, too.
* I doubled the recipe to get 6 dozen mini-pies. The amount listed above will also make 1 traditional sized Derby pie.

Wednesday, April 29, 2009

Stuff You Need
Sorry guys...or the two or three of you who read my blog...I originally intended the "Stuff You Need" feature to be on Mondays. But this week has been crazy, so I hope you won't abandon me for doing "Stuff You Need" on Wednesdays from time to time.
So, I know it's been killing you. What do you need now? You need...

a Silpat!

What the heck is a Silpat? It's a super-nonstick baking mat made of fiberglass mesh and silicone. You never need to grease it. Nothing will stick to it...nothing. They're perfect for biscuits and cookies. Don't you hate it when you bake cookies or biscuits and the bottoms get too brown and then stick? Not anymore...you'll have perfect bottoms that slide right off the baking mat! Have you ever seen those baking challenges on Food Network? You know where they try to build a practically life-sized building out of cereal and marshmallows or something equally crazy? Well...when those chefs are making sugar decorations, what do they use to mold their sugar on? A Silpat! Because NOTHING will stick.

One thing I need to make sure you understand...this thing is not a cutting board. If you cut on it, you could release the fiberglass mesh into the food, and that can't be good for you. They're strictly for baking.

Where can you get a Silpat? (Or two...because you need at least two.) Mine came from Bed, Bath, and Beyond as a wedding gift. They're also sold at Sur la Table, Williams-Sonoma, Macy's, and a ton of other places. They come in different shapes and sizes (even an octogon shaped one for the microwave!), and you can check those out, as well as a list of FAQs at http://www.silpat.com/.

Related Posts Plugin for WordPress, Blogger...