Showing posts with label Veggies. Show all posts

Monday, February 21, 2011

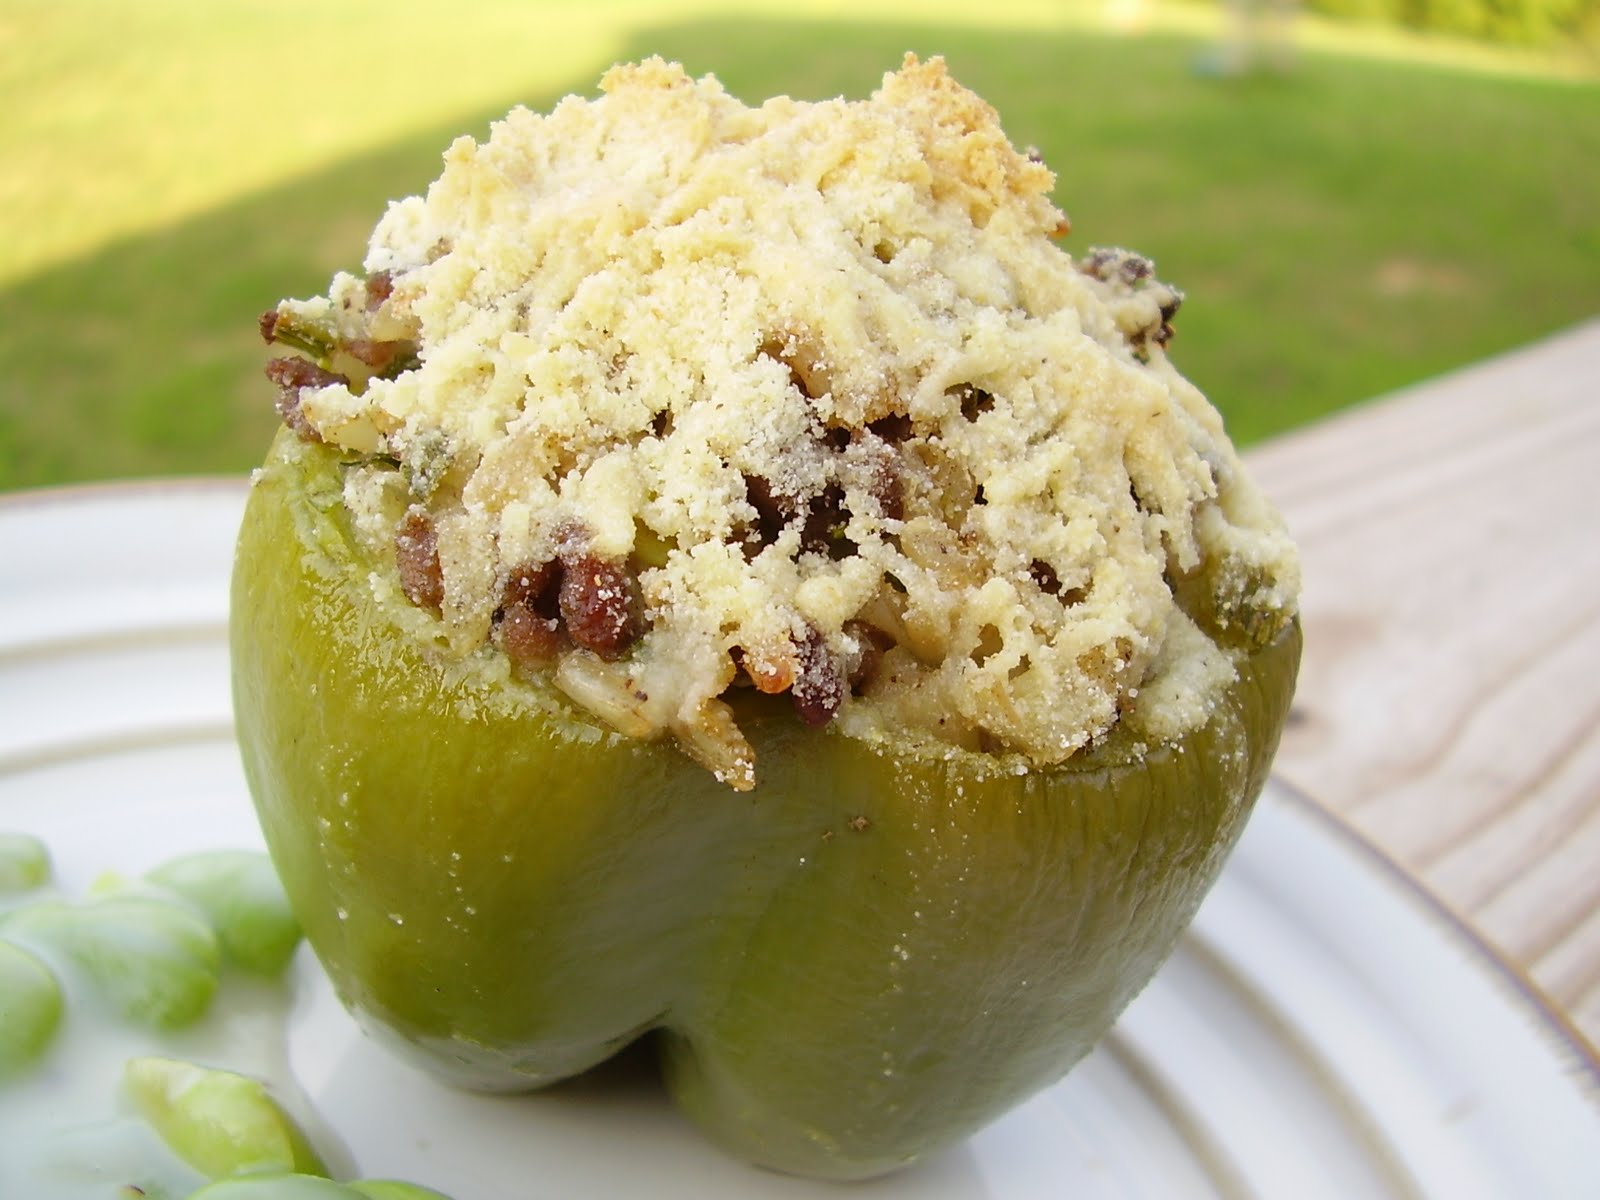
Stuffed Peppers

We never once had stuffed peppers for dinner when I was growing up. Never. Ever. The first time I ever saw a stuffed pepper was in the college dining center, and lots of friends commented on how much they dreaded it when their moms announced that they'd be having stuffed peppers for dinner. So...I'm not exactly sure what posessed me to try stuffed peppers in the first place! We've had them several times (one version is posted here), and this is my favorite recipe. I like that this one doesn't have any tomatoes, and I love the cornmeal topping!

This meal is really quite simple to put together, but there's a lot of preparation involved, most of which is chopping. (And by the way, if you have a good, sharp knife, it makes prep time a lot less tedious! Always remember, a dull knife is a dangerous knife.) There's also rice to prepare. What I'm telling you is this: this is not a quick meal to throw together. Don't even attempt it on a night that you're super-busy or super-tired. Save it for a day when you have plenty of time, and it will be well worth it. The leftovers heat up beautifully, and lots of times I have filling left over. When that happens, I portion it into ramekins, add the cornmeal topping, and bake. That way I have little pre-portioned lunches to just grab out of the fridge. And a bonus: it's healthy, too!

Stuffed Peppers
Adapted slightly from Heather's Website
4 medium green bell peppers
8 oz. lean ground beef
1 1/2 cup chopped onion
1/2 cup chopped celery
2 tsp. minced garlic
1 1/2 cup cooked brown rice
1/2 tsp. salt, plus more for seasoning
1/4 tsp. freshly ground black pepper, plus more for seasoning
1/2 tsp Greek seasoning (I use Cavender's)
1/4 cup chopped green onions (I use the whole thing)
1 tbs. chopped parsley leaves
2 tbs. plain cornmeal
2 tbs. grated parmesan
4 tsp. canola oil
Preheat the oven to 400 degrees. Cook brown rice.
Cut off the top quarter of each bell pepper and reserve. Scoop the seeds and veins out from the inside of each pepper and discard. Set bell pepper shells aside. Removed and discard the stems from each bell pepper top. Dice enough of the bell pepper tops to make 1/2 cup. Set aside.
In a large skillet, over medium-high heat, brown the ground beef until cooked through, about 4 minutes. Add the onions, 1/2 cup diced bell pepper, and celery. Saute for 4 minutes, or until the vegetables are soft. Add the garlic and cook, stirring, for 1 minute. Add the rice and mix well. Season with salt, pepper, and Greek seasoning. Cook for about 1 imnute. Remove from the heat and stir in the green onions and parsley. Season the insides of each bell pepper shell with salt and pepper, to taste. Spoon the rice mixutre into the bell peppers.
In a small bowl, combine the cornmeal and cheese. Season with a pinch of Greek seasoning and mix well. Sprinkle the crust over each pepper. Top each crust with 1 tsp. of canola oil and place the peppers into an 8-inch baking dish or pan. Add just enough water to cover the bottom, about 1/3 cup. Bake for 25-30 inutes, or until the tops are crust and brown and the filling is warmed through. Serve hot.

Tuesday, August 3, 2010

TWD: Gingered Carrot Cookies

My copy of Baking: From My Home to Yours has a flaw in it. I guess it was a misprint...it's missing about 50 pages from the cookie chapter, but I have a repeat of 50 pages of the brownie chapter. It's been a bit of a pain, but at the same time, kind of exciting because when TWD members choose a recipe from the 50 pages I'm missing, it's a surprise because I've never seen it. When I saw that this week's pick was Gingered Carrot Cookies, I thought it must have been a recipe I was missing. But when I checked, I had this page...somehow, in the 5,000 times I've flipped through this book, I've never noticed these!
When Dorie was developing this recipe, she was trying to make carrot cake in cookie form. She mentions that the carrot flavor doesn't really come through, and I would agree. These cookies are much like a scone...so much in fact that I've thought about trying to make them as scones...maybe this fall. With a cream cheese glaze! Yum. Butanyway, the only downside to these cookies is the fact that they look like the Cheddar Bay Biscuits from Red Lobster, no?
These delightful little cookies were chosen by Natalia of Gatti Fili e Farina, and she'll have the recipe on her blog. Happy Baking!

Thursday, June 10, 2010

Asparagus Frittata

I think I may have mentioned once or twice that David's grandmother has an asparagus bed that keeps us in delicious asparagus for a good part of the spring. We discovered that we both love roasted asparagus in the oven. It doesn't matter how much asparagus I roast at a time...we eat it all. But this spring, I decided that I should try something a little different.
So, I tried an asparagus frittata. It was so very good! I had a little trouble with it, but it was my first frittata and a learning experience. I absolutely despise runny eggs, so I think I went a little too far and cooked my eggs a little too long before popping the skillet in the oven. I ended up with a too-brown bottom. But overall, it was a success. It made a nice light Sunday night supper several weeks ago. Easy and tasty!
Asparagus Frittata
2 tsp. olive oil
1 small onion, thinly sliced
1/2 tsp. salt
1 lb. asparagus, tough ends snapped off, spears cut diagnonally into 1-inch lengths
4 large eggs, lightly beaten
1 cup shredded Gruyere or Swiss cheese
Heat olive oil into a 10-inch oven-proof frying pan over medium high heat. Add onions and salt and cook, stirring occasionally, until onions are softened, about 3 minutes. Add asparagus, reduce heat to medium-low, and cook, covered, until the asparagus are barely tender, 6 to 8 minutes. Pour in eggs and cook until almost set, but still runny on top, about 2 minutes. While cooking, preheat oven broiler.
Sprinkle cheese over eggs and put in oven to broil until cheese is melted and browned, about 3 to 4 minutes. Remove from oven with oven mitts and slide frittata onto a serving plate. Cut into wedges. Serves 4.

Monday, May 24, 2010

Kale Chips

I remember that when I first started reading food blogs well over a year ago, kale chips were making quite a splash in the blogosphere. It seemed like they were all over the place! People were buying kale by the bushel and roasting it in the oven, then gushing about how wonderful and healthy it was. (Okay, maybe part of that is an exaggeration, but not by much.)
I am not a picky eater by any means, but there are just some things that I haven't been able to like. Tapioca and kale are two of the foods that come to mind immediately. I have tried to like kale, I really have, but I have yet to eat any that I actually liked. Well, until today. I decided to take a leap of faith (I suppose I was feeling particularly adventurous) and make the much-lauded kale chips. There's no recipe really...it's really just roasting the leaves in a tiny smidgen of olive oil, salt, and paremsan cheese.
The roasting dries out the kale leaves just enough that they're pleasantly crunchy, but not fragile and brittle. The olive oil and the time in the oven certainly mellow the bitter taste that I've always hated about kale. They were actually pretty good! I fixed a bunch on a cookie sheet this afternoon and ate the whole thing! It's not a really substantial snack, but it sure satisfies a craving for something salty, savory, and crunchy. Give these a try...if nothing else, it's certainly an adventure in eating!

Kale Chips
1 bunch kale leaves (stripped from the thick stems)
olive oil (not much...a couple of teaspoons)
salt
shredded parmesan
Preheat oven to 375 degrees. Rinse kale leaves and spin them in a salad spinner until dry. Spread on a cookie sheet and drizzle lightly with olive oil. Sprinkle on salt and shredded parmesan. Slide cookie sheet into the hot oven for about 10 - 15 minutes. The kale leaves will shrink noticeably and get a little brown around the edges. When the kale chips look lightly browned, take them out and check on them. If they seem crisp (moreso around the edges than in the middle of the leaves), they're done.
Serve immediately. They'll be okay for a little while, but should be eaten within an hour or so.

Wednesday, April 21, 2010

Johnny Mazetti for a Living Treasure

My father-in-law, Earl, is a living treasure. Don't believe me? Click here to read all about it! He grew up in the Panama Canal Zone, and one of the local newspapers interviewed him about his childhood there, and his life after leaving the Canal Zone. It's really interesting...especially the part that explains why mosquitoes don't really bother him much anymore!
A couple of months ago, he emailed me a recipe for something called Johnny Mazetti, which is a dish he grew up eating in the Canal Zone. From what I understand, everyone in the Canal Zone loved this Johnny Mazetti stuff, and they're astounded to learn that it didn't originate there! In fact, the recipe is a variation of a different dish called Johnny Marzetti (notice the r here), which originated in a restaurant in Ohio! And after some research, it seems that Johnny Marzetti is a well-loved recipe in the Northeast (Ohio, Wisconsin, etc.). I'm just a little ol' Kentucky girl, and I'd never heard of the stuff before.

There are some differences between Johnny Mazetti and Johnny Marzetti. The Zonian version uses egg noodles, where the Ohio verison calls for elbow macaroni. The Zonian recipe requires something called Arturo sauce, whereas the Ohio version uses a spaghetti sauce. I found my recipe here (because I lost the one Earl emailed to me), and was pleased to find that it even included a recipe for the elusive Arturo sauce (because I certainly wasn't buying a case of the stuff). It seems that Arturo sauce is a key ingredient to Zonian Johnny Mazetti, because when Earl told his sister Mary that I was making Johnny Mazetti, she said, "How is she going to make Johnny Mazetti? She doesn't have Arturo sauce!" And let me tell you, this Arturo sauce is interesting stuff. Some of the ingredients: mushrooms, cider vinegar, soy sauce, brown sugar. When I mixed mine up, I couldn't decide if it smelled wonderful or horrible. I decided it would be best not to decide.
The recipe is really simple to prepare...there's just a lot of chopping and shredding involved. Green peppers, onions, celery, capers, olives, three kinds of cheese, etc. As I was reviewing the recipe, I thought to myself, "This is glorified homemade Hamburger Helper!" And I guess maybe it is. But I'd call it gourmet Hamburger Helper, at the very least. There are LOTS of strong flavors going on, and I was very skeptical about how it would come together. To my surprise, it was delicious! David and I both commented on how it smelled...it reminded us both of Bacon Cheeseburger Pizza from Hometown Pizza (a local pizza place). The creamy cheese, tangy olives, and wonderfully weird Arturo sauce combined for one delicious casserole. If you're stuck in a dinner rut and need something new and delicious, you should definitely give this one a try!

Johnny Mazetti
Recipe adapted from Best Room in the House
1 lb. ground beef
1-2 tsp. olive oil
1 green pepper, chopped fine
1 medium onion, chopped fine
1 stalk celery, chopped fine
1 medium can mushrooms, drained
3 cloves garlic
salt & pepper to taste
1 can tomato soup
1 can tomato sauce
1 tsp. chopped capers
1 can Arturo sauce (see recipe below)
1/2 bottle stuffed olives, drained and chopped
3/4 of 1 pkg. of egg noodles (maybe less), boiled
1/2 lb. shredded American cheese (shred your own!)
1/4 lb. shredded Swiss cheese (shred your own!)
1/4 lb. shredded mozzarella (shred your own!)
5 strips bacon, fried and crumbled
1/4 cup red or white wine (use white wine on odd days and red on even)
Preheat oven to 350 degrees. Spray a large casserole dish (at least 9x13) with cooking spray. Put a large pot of water on to boil. Brown ground beef in a very large skillet. Remove from skillet and drain well. Heat olive oil and saute green pepper, garlic, onion, and celery until softened. Add ground beef back to skillet and add mushrooms, tomato soup, tomato sauce, capers, Arturo sauce, and olives. Simmer on low until thoroughly heated. While the mixture is simmering, boil egg noodles, but not until they're al dente. They should still be a little undercooked. Pour contents of skillet into a very large bowl. Add in the half of each of the three shredded cheeses and al of the egg noodles. Mix until thoroughly combined. Place into greased casserole dish and top with remaining cheese and bacon. Bake for 1 hour. Yields 6-8 servings.
Arturo Sauce
Yields approximately 1 cup
1/4 cup finely chopped mushrooms
1/4 cup water
1/4 cup tomato sauce
1/4 cup soy sauce
1/4 cup cider vinegar
1 Tbs. brown sugar
1/2 tsp. salt
2 large cloves garlic, minced
1/4 tsp. black pepper
pinch of ginger
pinch of nutmeg
Combine all ingredients and mix well.

Friday, March 19, 2010

Minestrone Soup

On Sunday afternoon, when I planned my dinner menu for the week, I knew that I had a wild week ahead of me. I knew that I'd be working late a couple of evenings during the week, andI had an evening meeting at church. I needed simple meals, and I wanted at least one thing I could make ahead of time and reheat as needed. I remembered a recipe for minestrone soup that Chet made recently, and thought it would work well. I knew it would make a lot of soup, so I'd have plenty for lunches as well.
This was perfect for a hectic week. The soup came together effortlessly one evening while I was making another dinner. It's pretty hearty, but light at the same time, if that makes sense. It would be the perfect soup to take to someone who's had surgery or isn't able to get out of the house. And it's cheap, too! I don't know exactly how to give credit for this recipe; I got it from Chet, who got it from someone else. If you think it's your recipe, let me know and I'll be sure to give you credit. If you're looking for a simple, easy dinner that's healthy and inexpensive, this is it! Enjoy!
Minestrone Soup
Chet Lawrence
1 medium onion, chopped
2 cloves garlic, minced
28 oz. diced tomatoes, undrained (I used Italian-style)
15 oz. can Great Northern beans, drained
3/4 cup small pasta (I used whole-grain elbows)
1 box frozen, chopped spinach (thawed and drained)
15 oz. can green beans, drained
15 oz. can dark red kidney beans
2 chicken bouillion cubes
Saute onion and garlic in olive oil. Add tomatoes (with all juices). Fill empty tomato can three times with water and add to pot. Drain and rinse all beans and add to pot. Add spinach. Add bouillion and black pepper to taste. Cook until beans are tender. Add pasta and spinach. Cook until pasta is tender. Serve with grated parmesan cheese and crusty bread.

Tuesday, December 29, 2009

Quick Broccoli Slaw Stir-Fry with Turkey

After about a week and a half of the "Buddy the Elf" diet (cookies, candy, sugar, and syrup), it's high time David and I had green vegetables again! Sunday evening, I fixed a light and healthy dinner that was chock full of green vegetables. And there wasn't a stick of butter, glop of cheese, or can of cream of something soup in sight! Quite a change from the last several meals we'd eaten during the Christmas season! I don't know if it was really as good as we thought it was, or if it was just the fact that we hadn't eaten something healthy in so long, but this was gone in no time! It went together quickly, which is a huge plus, since we're in the middle of packing up everythingwe own in anticipation of moving. If you're tired of eating "junk", this is the perfect meal to get you back on the healthy eating train!
Quick Broccoli Slaw Stir-Fry with Turkey
adapted from a recipe by Weight Watchers International
1 Tbs. canola oil
4 green onions, sliced
1 (1-inch) piece of fresh ginger, peeled and minced
2 garlic cloves, minced
12 oz. broccoli slaw
5 oz. baby spinach
2 Tbs. teriyaki sauce
1 cup cooked turkey (leftover from Christmas!)
Brown rice
Heat the oil in a large nonstick skillet or wok; add the scallions, ginger and garlic and stir-fry until fragrant, about 30 seconds. Add the broccoli slaw and cook until just softened, about 2 minutes.
Stir in the spinach, a handful at a time, and the teriyaki sauce; cook, stirring, until the spinach is nearly wilted, about 2 minutes more. Sprinkle with the turkey and heat through; serve at once over hot brown rice.

Thursday, December 10, 2009

Chili-Rubbed Tilapia

David and I are pretty wimpy when it comes to spicy foods. Neither of us can tolerate heat very well, so when I found this recipe for Chili-Rubbed Tilapia, I was a little wary of trying it. It sounded so good though, that I went ahead and tried it. It turned out to be one of the best things we had last week for dinner!
The original recipe included a side dish of asparagus, but I decided to go with broccoli. It's not that we don't like asparagus (in fact, we love it), but it's just kind of expensive. We wait around for spring to harvest Mama's asparagus, and we have it at least three times a week. Oh, we get spoiled in the spring. The broccoli was a pretty good substitute, but I'll have to try it again this spring and use some fresh asparagus.
Chili-Rubbed Tilapia with Broccoli and Lemon
Adapted from a recipe from Heather's Website
1 lb. fresh broccoli, cut into florets
2 Tbs. chili powder
1/2 tsp. garlic powder
1/2 tsp. salt, divided
4 tilapia fillets (about 5 oz. each)
1 Tbs. plus 1 tsp. extra virgin olive oil
1.5 tsp. fresh lemon juice
Bring 1 inch of water to boil in a large pan. Place broccoli in a steamer basket; place basket in pan. Cover and steam for 3 minutes or until crisp-tender. Transfer to a large plate; spread out to cool.
Combine chili powder, garlic powder and 1/4 tsp. salt on a separate plate. Dredge fillets in mixture to coat. Heat 1 Tbs. oil in a large nonstick skillet over medium heat. Add tilapia and cook 5-7 minutes, gently turning halfway. Fish will be done when it is opaque in the center and flakes easily. Remove fish from skillet and cover to keep warm. Immediately add lemon juice, remaining salt, and 1 tsp. oil to pan. Add broccoli and cook 2 minutes, stirring constantly until broccoli is coated and heated through. Serve broccoli with tilapia.

Tuesday, December 1, 2009

The Best Flank Steak Marinade and a Shortcut

David and I have discovered that we both love flank steak, so I've been experimenting with different marinades in order to find the best one. We tried one marinade with honey, which was really quite good. Then, we tried a couple that really weren't anything special, which is why they never made it to this blog. But the other night, I found The Pioneer Woman's flank steak marinade. I knew I'd probably found my answer to the best flank steak marinade. For the one or two of you left in the country who aren't familiar with The Pioneer Woman, let me fill you in. She's one hilarious lady (whose real name is Ree) living her dream life on a cattle ranch in Oklahoma. She's got one handsome husband (Marlboro Man), four super-cute kiddos, and the laziest basset hound in the universe. Her website is updated daily with her regular musings on country life, what she's been cooking, helpful hints around the house, and updates on her adventures home-schooling her kids. She recently published a cookbook and has been on a whirlwind book tour, which sadly, isn't stopping anywhere in Kentucky. Anyway, I've tried several of her recipes, and they've all been really good. This one was really good.
You know what I love most about Ree's style of cooking? She does everything you're not "supposed" to do. She rinses her mushrooms! And her chicken! She uses "cooking sherry" instead of table wine! But her food is delicious. She likes to make "fancy" recipes now and again, but the bulk of her cooking is done for her husband and kids, who like simple, good food! And who doesn't? Anyway, here's the recipe for the most delicious flank steak I've ever put in my mouth.
The Pioneer Woman's Flank Steak
1/2 cup soy sauce
1/2 cup cooking sherry
3 Tbs. honey
2 Tbs. sesame oil
2 heaping Tbs. minced ginger
3-5 cloves minced garlic
1/2 tsp. crushed red pepper flake
1 whole flank steak
Combine all ingredients in a glass or ceramic dish. Remove flank steak from package and give it a quick rinse. Coat both sides of the meat with the marinade. Refrigerate for at least 3-6 hours.
Now, for the shortcut I promised you. The night we had the flank steak, I had to work late. But I really wanted a baked sweet potato with my meal. Instead of putting my sweet potato (and David's regular potato) in the oven to bake for an hour when I got home (which would have resulted in a very late supper), I stuck it in my crock pot on low before I left for work! It was perfect! The sweet potato and regular potato were absolutely wonderful with our flank steak and green beans. I can't take credit for this stroke of genius, though. I overheard my friend Leslie telling someone that she cooked baked potatoes in the crockpot sometimes. So I stole her idea, and I'm so thankful for her wonderful suggestion! It makes for a quick, easy side dish that's ready whenever you are!

Saturday, November 28, 2009

Thanksgiving Recap

Thursday afternoon, David and I headed to Mom and Chet's for Thanksgiving. I love Thanksgiving. Aside from setting aside time to really consider the many blessings we have in our lives, it's about the food. And I love the food! This year, the celebration involved David and I (of course), Mom and Chet, Allison and Larry (my sister and brother-in-law), and Paul and Marty (Mom and Chet's neighbors). We had quite the spread for the eight of us...by the end of the afternoon, we were stuffed. Here's a recap of the Thanksgiving deliciousness! Chet carved the bird. He brined it overnight, and it was moist and delicious! I focused on the dark meat this year...something new for me. And oh, it was good!
The stove was a busy, busy place! Gravy, broccoli, and noodles up top, and rolls in the oven.
Here's the platter piled high with turkey. This was maybe half of the bird. Again, most and delicious!
One of my favorites...cranberry sauce! This year, Chet made his own, and it was wonderful! It was full of fresh cranberries, apples, pecans, and orange zest. He has promised me the recipe. Oh, it was good!
And the dressing/stuffing...whatever you want to call it. Chet's stuffing is a mixture of cornbread and regular bread (I think). Anyway, it's good. It's not dry and crunchy like some dressing is. This stuff is moist and full of yum!
This is fall broccoli that just came out of Chet's garden last week. I didn't even know you could grow fall broccoli, but now I know. Oh, it was good. I love fresh broccoli.
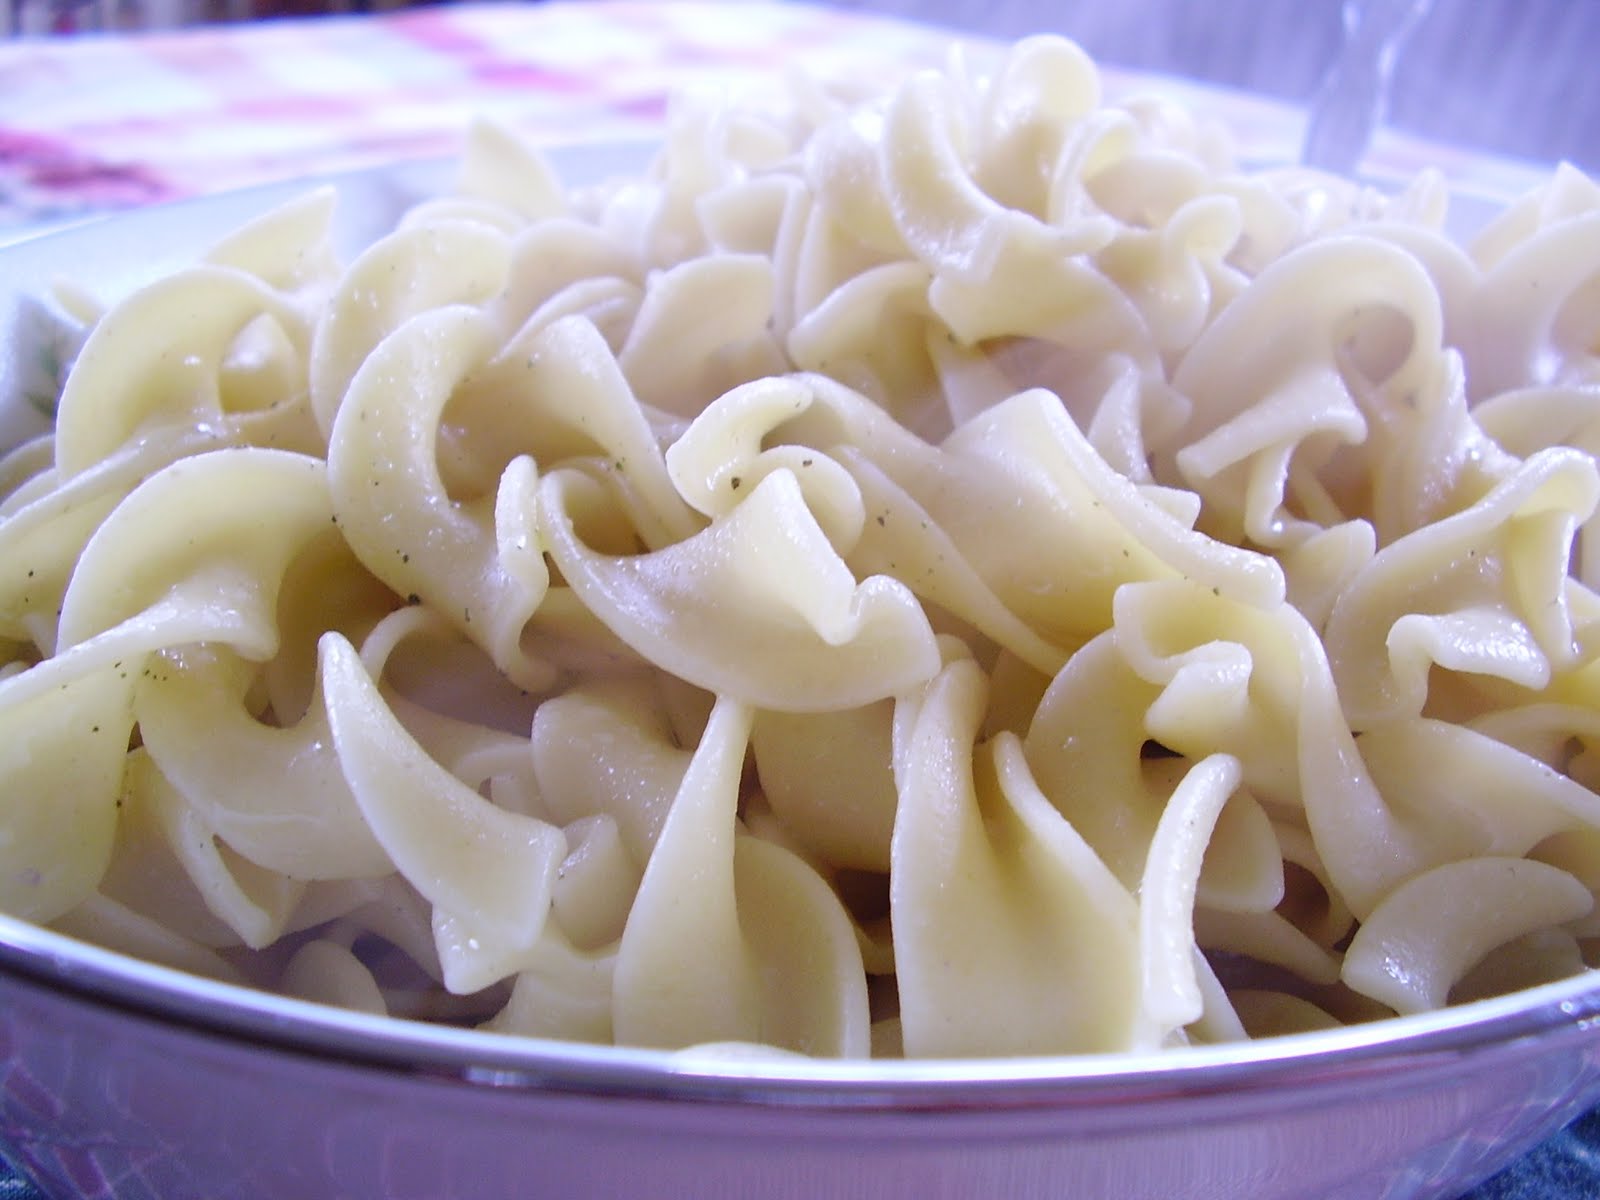
And noodles! I know...you guys are probably thinking that we're some kind of freaks at Thanksgiving. No mashed potatoes in sight, but we do have broccoli and egg noodles! I never really thought of egg noodles as Thanksgiving food, but when Mom and Chet got married, Chet fixed them for Thanksgiving because his family alway had them with Thanksgiving dinner. Yeah, I thought it was weird at first, but now, they just seem like a part of Thanksgiving. It wouldn't be the same without them. I like to pour dressing over my noodles and dressing, then eat a little noodle and a little dressing at the same time. Carb overload! Yum!
This sweet potato casserole was one of my contributions. I love this stuff. There aren't words to describe how much I adore this stuff. It's really sweet, but I love to have it with holiday (Thankgiving and Christmas) meals. The sweet potatoes are mashed, and then there's the crunchy, sweet topping. Oh, mercy. It's the perfect foil to all the savory stuff. You'll find the recipe at the end of this post.
These yeast rolls are absolutely wonderful. They're Chet's mom's recipe. And they're made with lard. Don't even think about trying to make them without the lard. Chet's pretty much got the recipe down pat, and they are the hit of Thanksgiving and Christmas. I've got to learn to make these...it'll force me to get over my fear of yeast.
Here's the holiday table, ready for us to devour everything in sight. See the pretty fruit salad? Paul and Marty brought that, and it was wonderful!
For dessert, I brought this. It's a pumpkin caramel pound cake. I was less than impressed, but I'll post the recipe tomorrow. Paul also brought one of his famous cheesecakes...pumpkin! How in the world I got out of the house without a picture of it is beyond me. I was snapping pictures like a fool. Allison said I was the food paparazzi. Anyway, as you can tell, we were gluttons on Thanksgiving. We ate too much, but it was so nice to spend a lazy Thursday afternoon with family and friends.
Sweet Potato Casserole
Cathy Lawrence (my mom)
For the Casserole:
40 oz. sweet potatoes in syrup
1 1/2 cups white sugar (you could probably back off to 1 cup)
2 eggs
1 cup milk
1 tsp. nutmeg
1 1/2 tsp. cinnamon
For the Topping:
1 stick butter
1/2 cup brown sugar
3/4 cup Rice Crispies
1/2 cup crushed nuts (optional, but I always use them)
Preheat oven to 350 degrees. Drain sweet potatoes well. Mash potatoes, and add sugar, eggs, milk, nutmeg and cinnamon. Mix until all ingredients are well incorporated. Pour mixture into a greased casserole dish (9x13 is a good size, but I used a 12-inch round tart pan) and bake for 30 minutes. To make the topping, melt the butter and mix in brown sugar, Rice Crispies, and nuts. Spread over sweet potato mixture and return to oven to bake for another 15 minutes.

Monday, November 23, 2009

Tuscan Chickpea Soup

I'm not a picky eater, but I do have a little problem with texture. If the texture of a food gives me the creepin' willies, I just can't eat it, no matter how good it tastes. Tapioca is a fine example of this. The flavor of tapioca pudding is delicious, but the texture of those tapioca pearls is too much. I feel like I've got a mouth full of fish eyeballs...I just can't do it.
David, on the other hand, will pretty much eat anything that won't eat him first. There are some things he doesn't like much, but he still eats them. But this soup? Nope...not on the list. He hated it. He admitted that the flavor was fine, but he couldn't get past the texture. He said he felt like I was serving him baby food!
You see, I had used the immersion blender (thanks, Earl and Shirley!) on this Tuscan Chickpea Soup. I had in mind that it would have a delightful, velvety mouthfeel. It was pretty good (not quite velvety), but David just didn't care for the texture at all! So we won't have Tuscan Chickpea Soup here at the Orr house ever again, but it's worth trying, if you don't have any "texture issues" in your household! I took it for my lunch for several days, and it reheats nicely. It's a hearty soup, what with all the chickpeas and all, and it great on crisp, cool fall days. It's easy to throw together, and of course, you get to use the immersion blender!
Tuscan Chickpea Soup
adapted from a recipe from Core and More Recipes
2 Tbs. canola oil
1 large onion, chopped
8 garlic cloves, minced
1 jalapeno, chopped (I omitted this)
1 large bell pepper
4 cups chicken stock
1/4 tsp. dried rosemary (could've used more)
salt and cayenne, to taste
3 (15.5 oz) cans chickpeas, drained and rinsed
14.5 oz diced tomatoes, drained
2 Tbs. balsamic vinegar
Heat oil in large soup pot over medium heat. Add onion, garlic, jalapeno, and bell pepper and cook for 10 minutes, stirring frequently. Stir in stock and next 5 ingredients and bring to a boil. Reduce heat and simmer for 20 minutes.
Use an immersion blender to process/puree the soup until smooth. You can also puree the soup in batches using a regular blender. Stir in the balsamic vinegar and serve with a splash of additional balsamic vinegar on top.

Friday, November 13, 2009

Chicken Barley Bake

It was another quick and easy dinner night, and another brand new recipe. I've mentioned before that I went on a whole grain kick awhile back, which left me with Mason jars full of "exotic" grains (at least they're exotic to me): pearled barley, whole wheat couscous, bulgur wheat, steel cut oats, etc. I'm slowly but surely working my way through my supply, and it's been exciting to find new recipes and try new things. Tonight's recipe features pearled barley, which is very tender and mild. I think it's kind of like puffy, chewy oatmeal, but in a good way.

For this recipe, I combined my pearled barley with onions, carrots, garlic, chicken broth, and poultry seasoning. I sweated the onions, garlic, and carrots, then added my barley to the skillet, just to toast it a tiny bit. I added the chicken broth and poultry seasoning, then brought the whole thing to a boil. The barley mixture is dumped into a 9x9-inch pan, some skinless chicken thighs are plopped on top, and then the whole mess goes into the oven for about an hour. Then, you get this:
It looks kind of boring, and it doesn't have over-the-top flavor, but it was good. It could use some doctoring up, which is what I plan to try in the future. I'd like to add some broccoli and spinach to the barley mixture. It also needed some salt, and next time I'll certainly add some Greek seasoning. That should help.
Why have I not been using chicken thighs for the past three years? I've always thought that I didn't like dark meat, but I've discovered that it's really my favorite! There'll definitely be more chicken thigh purchases in my future...and they're cheaper than chicken breasts. More flavor for less money...it's a winner!
If you're interested in introducing whole grains into your diet, this would be a great place to start. I actually found pearled barley in my regular grocery store (Kroger), instead of having to go to Whole Foods! Kroger keeps the pearled barley with the dried beans, just in case you need a little help finding it.
Chicken Barley Bake
Adapted from a recipe from Heather's Site
1 cup chopped onion
3/4 cup chopped carrots
3/4 cup chicken broth
3/4 cup pearled barley
1/4 tsp. chicken bouillon
1/2 tsp. poultry seasoning
2 cloves garlic, minced
4 chicken thighs, skinned (1.5 lbs)
Preheat oven to 350 degrees. In a medium saucepan, sweat onions, carrots, and garlic, just until the onions are translucent. Add barley and toast for about a minute (don't let it burn!). Add broth, barley, bouillon, and poultry seasoning. Bring mixture to a boil, then pour into a 9x9-inch baking dish. Arrange chicken thighs on top of mixture. Season chicken thighs with salt/pepper and any other seasonings you'd like. Cover with aluminum foil and bake for about 45 minutes. Uncover chicken and continue to bake for an additional 15 minutes.

Friday, October 30, 2009

Potato, Ham, and Spinach Soup

I've had designs on making this soup for well over a year. I used a recipe from the Louisville Courier-Journal as my starting point, but I made several changes along the way. I clipped the original recipe out of the paper sometime last fall or winter, and tucked it away in my recipe file, which grows larger by the week. I finally decided to rummage through it last Sunday and found this one. It's perfect for a chilly fall day, except those seem to have left Kentucky. Now, we've got highs in the mid-70s! Good grief...I thought we'd finally gotten rid of summer for awhile, but she's reared her ugly head again. Fall, please come back!
This soup is full of ham, potatoes, beans, and spinach. It's the perfect soup to make when it's time to use leftovers, because you could dump just about anything in here, and it would be good. The original recipe called for smoked sausage and kale. I used ham and spinach instead. I've really tried to like kale, but I just haven't seemed to acquire the tastebuds for it yet. I'm still willing to try it, though...maybe I just haven't had it the right way yet. Anyway, here's the recipe for this yummy, hearty soup. If fall hasn't fled your area, it would make a perfect dinner for those nights when you're snuggled up on the couch watching football! Enjoy!
Potato, Ham, and Spinach Soup
adapted from a recipe from the Louisville Courier-Journal
2 Tbs. olive oil
1/2 lb. ham
1 large onion, diced
6-8 large cloves garlic, minced
4 large potatoes, diced
1 large bunch spinach
2 quarts chicken stock (or a mixture of stock and water)
2 15oz. cans of white beans, drained and rinsed
salt and lots of black pepper
Heat olive oil in a wide, deep soup pot over medium heat. Add ham, chopping it into bite-sized pieces.
Add onion and garlic. Stir often, until softened, about 5-10 minutes.
Add diced potatoes. Wash and remove long stems from spinach. Cut into wide slivers. Add potatoes and spinach.
Add chicken stock and increase the heat to high. Bring the soup to a boil, then reduce heat to a simmer. Simmer for 20-25 minutes, or until the potoates are very soft. Use a potato masher to roughly mash the potatoes in order to thicken the broth. Add beans and heat through. Season with salt and pepper.

Monday, October 26, 2009

Skillet Cabbage and Ham

I'm really a very predictable person. I like order, rules, and routine. My life is very regimented, and while lots of people would think that's really boring, it suits me just fine! But sometimes I wonder if I rely on my routine a little too much. After all, I'm the person who forgets to brush my teeth if my morning routine gets out of whack...really. That's happened on more than one occasion. Even my weekends have routines. Saturdays, I clean up the house and wash clothes. On Sunday, we go to church and I do my grocery shopping. But last night, I did something out of my routine, and tonight I was thanking myself for it!
Each Sunday before I go to the grocery, I make my menu for the week based on the leftovers in the fridge, what's on sale, and what sounds good. I knew that I had Skillet Cabbage and Ham on my list, as well as a soup (that you'll see later this week). Well, last night, instead of just shoving my produce in the fridge after coming home from the grocery, I "processed" it for some of my meals!
This delicious Skillet Cabbage and Ham started out as a small head of cabbage and two big ol' carrots, which were chopped and shredded--last night! It was so nice to not have to do that tonight after work! When I got home and started fixing supper, all I had to do was chop an apple, dice up some ham, sprinkle in some dry ingredients, and add some chicken stock and vinegar. Dinner was ready in no time, and with very minimal effort. David and I have had this meal before, but it was long before I started my blog. It's unlike most things we eat, which always makes for a nice change of pace. I really think of it as a fall meal, but you could certainly enjoy it any time of year. We added some roasted butternut squash and were quite happy with our little menu. I made a few adjustments to the original recipe, and I'll put my changes in parenthesis. I hope you enjoy!
Skillet Cabbage and Ham
Family Circle Magazine, December 2008
2 Tbs. olive oil
1/2 large head of green cabbage, thinly sliced
2 large carrots, peeled and shredded
1/2 cup white wine (I used chicken broth)
10 oz. ham, cut into bite sized pieces
1 large apple, cored and diced (I used a Golden Delicious)
1 Tbs. apple cider vinegar
1 1/2 tsp. caraway seeds
1/2 tsp. salt
1/4 tsp. black pepper
Heat oil in a large nonstick skillet over medium-high heat. Add cabbage and carrot and cook, covered, for 5 minutes, stirring occasionally.
Stir in wine (or broth) and simmer for 1 minute. Add ham, apple, vinegar, caraway seeds, salt, and pepper. Simmer on medium heat for 5 minutes, uncovered, stirring, until cabbage and apples are tender and most of the liquid has cooked off.
Cover and let stand a few minutes before serving.

Monday, October 19, 2009

Stuffed Peppers

I haven't been keeping up with my blog like I'd like to. It's been kind of neglected for the last couple of weeks, but let me tell you why. David and I are in the process of building our house, and in the evenings after work, we go over there and clean up for an hour or two so the construction people/drywall men/etc. can work the next day and not have to walk around/on/through a bunch of debris. This means that our meals haven't been quite as exciting lately, and when they have been, they've been made after dark. And that means that the picture quality isn't great, but I'm figuring out a few spots in the house that will allow me to take a good picture. Tonight, we had stuffed peppers:
First, let me say that these weren't made using my favorite stuffed pepper recipe. I was in a super-big hurry this morning and couldn't find that recipe, but I did find this one. I ran around the house gathering ingredients out of the freezer and sticking them in the fridge in hopes that they'd be thawed out by the time I got home, so that I could assemble the peppers before going to the new house to clean. (But they weren't.) So, we had Ellie Krieger's Stuffed Peppers. They were okay, but I like my other recipe better. She says I should have used red peppers, which I like better, but they were over a dollar each. The green peppers were 88 cents each. That was an easy choice. I like the fact that she used bulgur, spinach, and zucchini in the filling, but there just wasn't enough flavor. If I make these again, I'll have to jazz these up a bit. I'd probably liberally season both the filling and the insides of the peppers with Cavender's Greek Seasoning. I think that would help a lot.
I do like the feta cheese that she suggested I sprinkle on top, but I don't think I used enough. The topping on my favorite stuffed peppers (the one that I can't find the recipe for) includes cornmeal and olive oil. It is delicious...crunchy, corny, and salty. Much better than tomatoes and feta cheese. But that's another post. If you like stuffed peppers, these are definitely worth a try, but they just aren't my favorite. Here's the recipe if you'd like to try them...
Greek-Style Stuffed Peppers

1 lb. lean ground beef
10 oz. frozen chopped spinach, thawed and squeezed dry
1 medium zucchini, coarsley grated (about 2 cups)
1 small onion, minced (about 1 cup)
1/2 cup bulgur
1 egg, lightly beaten
1/2 tsp. dried oregano
1/2 tsp. salt
freshly ground black pepper
3 red bell peppers, halved lengthwise, cores and ribs removed
2 (14.5 oz.) cans low-sodium stewed tomatoes, finely chopped
1/3 cup crumbled feta cheese


Preheat oven to 350 degrees.
In a large bowl, combine the beef, spinach, zucchini, onion, bulgur, egg, oregano, salt, and a few grinds of pepper. Mix until throughly combined.
Arrange the pepper halves cut side up in a 9x13-inch baking dish and fill each pepper half with the meat mixture. Pour the tomatoes over the peppers and sprinkle with the feta cheese. Cover with foil and bake for 30 minutes. Uncover and bake until the meat mixture is completely cooked and the peppers are tender, about 25 minutes longer.
Now, I'll leave you with a picture of the kitchen. We've still got a ways to go, but it's looking better every day!

Sunday, September 27, 2009

Taco Soup

It's been another wild week at my house. Last Monday and Tuesday, David and I took a couple of vacation days and visited Jenny Wiley State Park. That left Wednesday, Thursday, and part of Friday to prepare for the weekend class I was scheduled to teach. Friday night and all day Saturday were spent teaching. Monday and Tuesday of this coming week, I have to be out of town for work-related stuff. Whew! I think I only made one home-cooked meal last week, and it was a grilled chicken salad...hardly anything to blog about! I feel like I've neglected David in the food department, so on Saturday evening, while he was settling in for the UK-Florida massacre, I set about making a big ol' part of soup for him to have while I'm out of town.
I decided on Paula Deen's Taco Soup for a number of reasons. It's quick. It's easy. It's hearty. It's man-friendly. It's full of fiber (okay, so that reason is a stretch). And it's super-tasty!
Please forgive me for the less-than-perfect photo. I was on my way out the door tonight and snapped a quick picture. This soup is a staple in our house during the fall and winter, because it's just that good...I mean, what else would you expect from Paula Deen? Anyway, give this recipe a try on the first chance that you get. You won't be disappointed!
Taco Soup
Ingredients:
Jalapenos
Chopped green onions
Grated cheese
Sour cream
Corn chips
1 1-ounce package ranch salad dressing mix
1 1 1/4-ounce package taco seasoning mix
1/2 cup green olives, sliced (optional)
1 small can black olives, drained and sliced (optional)
2 4 1/2-ounce cans diced green chilies
1 14 1/2-ounce can tomatoes with chilies
1 14 1/2-ounce can diced tomatoes
1 14 1/2-ounce can mexican tomatoes
1 15 1/4-ounce can whole kernal corn, drained
1 15 1/2-ounce cans pink kidney beans
2 15-1/2 ounce cans pinto beans
2 cup diced onions
2 lb ground beef
Directions:
Brown the ground beef and onions in a large skillet; drain the excess fat, then transfer the browned beef and onions to a large crackpot or a stockpot. Add the beans, corn, green onions, tomatoes, chilies, olives, and seasonings, and cook on low setting all day (6 to 8 hours) if using a crockpot, or simmer over low heat for about 1 hour in a stockpot on the stove. To serve, place a few corn chips in each bowl and ladle soup over them. Top with sour cream, cheese, and jalapenos.

Saturday, September 26, 2009

The Ultimate Compliment

If you're a regular around here, you know that I work for Lindsey Wilson College's School of Professional Counseling. I work at one of their many extended campus sites, and part of my job duties include teaching. All of our courses are offered on weekends, so that means that several of my weekends are spent teaching on Friday nights and on Saturdays. Today was the last meeting of one of the classes that I'm teaching during this semester, so we decided to have a potluck lunch. I brought corn pudding. Mmm...
It was during this potluck lunch that I received what I consider to be the ultimate compliment. One of my students said, "Erin, who taught you how to cook? Paula Deen?" Besides the fact that in my mind Paula Deen's food = delicious, it meant even more that it came from a woman who was raised in the deep South, where they know real, good Southern food. Several of the students really liked the corn pudding, which is easily in my Top 5 Favorite Foods list. A number of them even asked me for the recipe. But I didn't give it out, and I won't post the recipe here...for now. You see, I didn't get this recipe until I married my husband, so I kind of get the impression that it's maybe a secret family recipe. After all, the Klingenfus/Orr clan refers to it as "Aunt Lila's Corn Pudding." (Just as an aside...neither David nor I know who Aunt Lila is/was.) There's nothing difficult or labor-intensive about the recipe...in fact I put it together at 6am this morning while I was still half-asleep. But it's just perfect. It's wonderfully moist, but not runny. It's slightly sweet, but not too sweet. It's got a perfect corn to cornbread ratio. It's corn pudding perfection.
So, after listening to me wax poetic about the corn pudding, do you have a secret family recipe? Or your no-fail, go-to recipe that gets tons of compliments? Fill us in!

Monday, August 31, 2009

Benedictine

Do you know about Benedictine spread? It's a delicious cucumber and cream cheese spread. It was invented in Louisville by a prominent caterer named Jennie Benedict. She was Louisville's foremost caterer at the turn of the 20th century, and Benedictine spread is her most well-known recipe. She also published a cookbook of her recipes in 1904, which she called The Blue Ribbon Cookbook. It was out of print for many years, but was recently reprinted, and I received a copy of it for Christmas last year. Many of the recipes are, well...strange. There's a whole chapter on "Sick Room Cookery," foods meant to help speed the recovery from illness. I haven't made many things from this cookbook, but I did decide to try one of the many Benedictine recipes that have been included. "Miss Jennie" didn't include her own recipe for Benedictine in any of her cookbooks, but many local restarauteurs included theirs in the newest reprint of The Blue Ribbon Cookbook. The one I tried comes from Lilly's restaraunt in Louisville.
My sister Allison loves Benedictine just as much as I do, so I decided to make her a batch of Benedictine to have for her lunch this week. Why? No reason, really. I just love her! I hope she enjoys it. I tasted it, and it's pretty darn good. I'll have to try some of the other recipes as well. Cucumbers have been on sale lately...grab a couple and make a batch of Benedictine!
Lilly's Benedictine
Kathy Cary, owner of Lilly's Restaurant in Louisville
8 oz. cream cheese
1 cucumber, peeled, seeded, and finely chopped
2 Tbs. red onion, finely chopped
1/4 tsp. kosher salt
1/4 tsp. freshly ground black pepper
1 Tbs. fresh dill, finely chopped
Bring cream cheese to room temperature. Add other ingredients and mix well.

Monday, August 10, 2009

Beef and Pepper Stir-Fry

A couple of weeks ago, I got my newest copy of Good Housekeeping. I hadn't really had an opportunity to sit down and read it until this past weekend, but as soon as I got it, I flipped through it and noticed the recipe for Beef and Pepper Stir-Fry. I marked it and made note on my grocery list the few ingredients I'd need.
I made the stir-fry dish tonight, and it was delicious! As a bonus, it was healthy, easy to prepare, and quick! That's a dish that meets my "weeknight supper" criteria perfectly! Please excuse my pictures...we've got a storm brewin' here in Kentucky and my natural light is gone.
Beef and Pepper Stir Fry
Good Housekeeping

1 lb. flank steak, cut lengthwise in half and very thinly sliced
4 Tbs. lower-sodium teriyaki sauce
4 green onions
1 c. instant brown rice (I used regular, long-cooking)
3 tsp. canola oil (I used olive)
1 clove garlic, finely chopped (I used 2 and pressed it)
1/4 tsp. crushed red pepper
2 red peppers, thinly sliced
In a small bowl, toss beef with 1 tablespoon teriyaki sauce.
Thinly slice dark green tops from green onions and reserve for garnish; cut remaining white and light green parts into 1-inch pieces. Cook rice as label suggests.
In 12-inch skillet, heat 2 teaspoons oil on medium-high heat until hot. Add garlic and crushed red pepper; cook 1 minute. Add green onion pieces, red pepper slices, and 2 tablespoons water; cook 4 to 5 minutes or until peppers are tender, stirring frequently. Transfer to medium bowl. Keep warm.

In same skillet, heat remaining teaspoon oil until hot. Add half of beef; cook 1 minute or until beef just loses its pink color throughout, stirring. Transfer to bowl with peppers; keep warm. Repeat with remaining beef.
Add remaining 3 tablespoons teriyaki sauce to skillet; cook 30 seconds, stirring. Add to beef and vegetable mixture; stir to combine. Serve stir-fry over rice. Garnish with reserved green onions.

Friday, August 7, 2009

Garlic Chicken Pasta with Spinach

Before I begin, I owe many thanks to Amanda (of Amanda's Cookin') for helping me figure out what's wrong with some of my pictures. If you look at these pictures, and especially the ones of the Classic Banana Bundt Cake, you'll see a bright, blurry spot right in the center of the pictures. I've had a heck of a time figuring out what that was! Amanda asked if I had a smudge on my lens, and lo and behold, that was the problem! I'd never thought of that! Thanks Amanda, for helping out a newbie! I appreciate it!
Now let's get down to business...the food! When David and I got married, we ate lots of pasta. I don't know why. I guess because it's quick and cheap. But it can make you chunky if you eat too much of it, which is what started happening to us. We cut way back on pasta, switched to the whole wheat variety when we do have it, and started eating more lean meats and veggies. But we still love the stuff, so we have it about once a week or so. As you probably know by now, I can easily get bored cooking the same things over and over again, so I'm developing a rather large file of recipes to try. Light and healthy pasta recipes seem to be few and far between, so when I find one, I snap it up and try it out as soon as possible. And, since it's summer, I'm not really feeling heavy meat sauces. The last few pasta recipes I've tried have nary a tomato in sight, and they're great!
I found this recipe on Melanie's site, My Kitchen Cafe. I can't even remember how I found her and her wonderful little corner of the Internet, but I'm so glad that I did. I've tried several of her recipes, and they've all been absolutely delicious! She has no idea, but she got David and me through Bible school week (when I was gone pretty much every night) on her healthy crockpot meals! Because it was Bible school, I didn't get pictures of the dishes, but they were so good that they're definitely on the "make again" list. I turned to her again this week when I needed a healthy, quick dish for supper. The Garlic Chicken Pasta with Spinach was wonderful, and so easy! I think she originally got the recipe from Cook's Country and did some tweaking.
Garlic Chicken and Pasta with Spinach
6 garlic cloves, minced
1/4 tsp. red pepper flakes
6 Tbs. olive oil (I cut this back to about 4 Tbs.)
1 lb. boneless, skinless chicken breasts
salt and pepper to taste
1 lb. penne pasta (I used whole wheat)
5 oz. baby spinach
1/2 cup chopped fresh basil or 1 Tbs. dried basil
6 Tbs. freshly squeezed lemon juice
1 cup grated parmesan cheese
Bring 4 quarts of water to a boil. Meanwhile, combine garlic, pepper flakes, and oil in a small microwave-safe bowl and microwave until the garlic is golden and fragrant, about 1 minute.
Pat the chicken dry with paper towels and cut into bite-sized pieces. Season with salt and pepper. Transfer 1 tablespoon of the garlic/red pepper oil to a large skillet and heat over medium heat until oil is rippling. Add chicken and cook until well browned and cooked through. Transfer to a plate and tent with foil.
Add 1 tablespoon salt and the pasta to the boiling water and cook until tender but still lightly firm (al dente). Reserve 1/2 cup cooking water. Drain pasta and return to pot. Stir in chicken, spinach, basil, lemon juice, parmesan cheese, and remaining garlic/red pepper oil, adding reserved pasta water as needed. Season with salt and pepper serve immediately.
Related Posts Plugin for WordPress, Blogger...