Showing posts with label Breakfast. Show all posts

Tuesday, March 29, 2011

Bun in the Oven

The blog posts around here have been kind of hit or miss lately, and I apologize. Things are getting pretty hectic around here. It's been a busy semester with work, and there's more news, too. We're expecting a baby! Yep, we've got a bun in the oven here at The Sweet Life! The Little Sweetie will be here in early June of this year...in just about 2 months! (If you're interested in reading more pregnancy news, click here.) I had plans to make these cinnamon rolls much earlier in my pregnancy and announce our big news with a picture of the rolls in the oven. Well...I just never got around to it until this weekend (at 31 weeks pregnant!), and then I forgot to take the "bun in the oven" picture! Sheesh. Butanyway, without further ado, I give you Ultimate Cinnamon Rolls, from Cook's Country: I think part of my not getting around to making these rolls had more than a little to do with my fear of yeast bread, but pregnancy cravings trumped my fear this weekend, and I put these delicious rolls together last Friday night after I got home from work. The recipe is pretty daunting when you just look at it, but really, it's very simple. I made the dough, let it rise, and assembled the rolls on Friday night. Then, I woke up Saturday morning, took the pan of rolls out of the fridge, turned on the oven, and went back to bed. About 2 hours later, we got up and I stuck the rolls in the oven. Then, about 40 minutes later, I had beautiful, decadent, homemade cinnamon rolls on the table. Oh, yum.
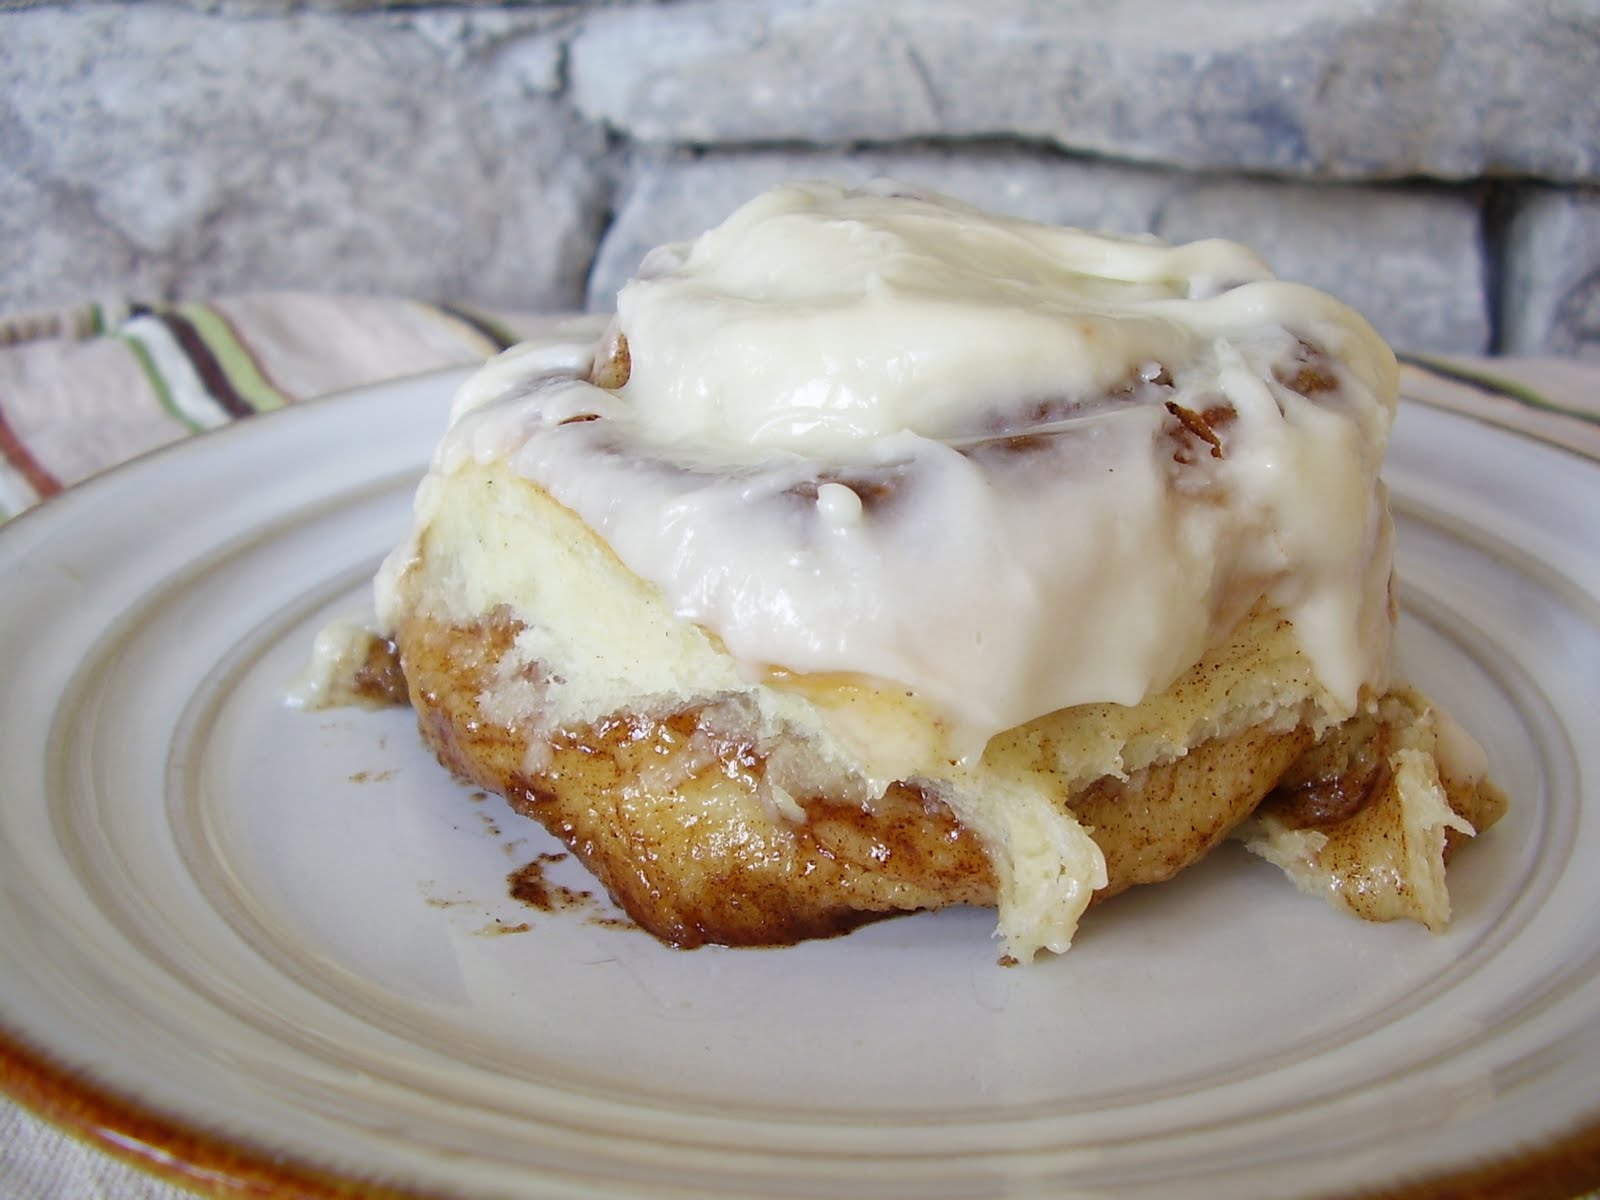
These rolls are so very good, but they're really an obnoxious size. They are HUGE! These are definitely special occasion treats...like for when you announce to the blog world that you're expecting a little one!

Ultimate Cinnamon Buns

Cook's Country

Dough 3/4 cup whole milk, heated to 110 degrees 2 1/2 tsp. instant or rapid-rise yeast 3 large eggs, room temperature 4 1/4 cups all-purpose flour 1/2 cup cornstarch 1/2 cup granulated sugar 1 1/2 tsp. salt 12 Tbs. unsalted butter, cut into 12 pieces and softened Filling 1 1/2 cups packed light brown sugar 1 1/2 Tbs. ground cinnamon 1/4 tsp. salt 4 Tbs. unsalted butter, softened Glaze 4 oz. cream cheese, softened 1 Tbs. whole milk 1 tsp. vanilla extract 1 1/2 cups confectioner's sugar
Instructions: 1. For the dough: Adjust oven rack to middle position and heat oven to 200 degrees. When the oven reaches 200 degrees, shut off. Line 13x9 inch baking pan with foil, allowing excess foil to hang over pan edges. Grease foil and a medium bowl. 2. Whisk milk and yeast in measuring cup until yeast dissolves, then whisk in eggs. In bowl of stand mixer fitted with dough hook, mix flour, cornstarch, sugar, and salt until combined. With mixer on low, add warm milk mixture in steady stream and mix until dough comes together, about 1 minute. Increase speed to medium, and add butter, one piece at a time, until incorporated. Continue to mix until dough is smooth and comes away from the sides of the bowl, about 10 minutes. Turn dough out onto clean surface and knead to form a smooth, round ball. Transfer dough to prepared bowl, cover with plastic wrap, and place in warm oven. Let rise until doubled in size, about 2 hours. 3. For the filling: Combine brown sugar, cinnamon, and salt in small bowl. Turn dough out onto lightly floured surface. Roll dough into 18-inch square, spread with butter, and sprinkle evenly with filling. Starting with the edge nearest you, roll dough into tight cylinder, pinch lightly to seal seam, and cut into 8 pieces. Transfer pieces, cut-side up, to prepared pan. Cover with plastic wrap and let rise in warm spot until doubled in size. 4. For the glaze, and to bake: Heat oven to 350 degrees. Whisk cream cheese, milk, vanilla, and confectioner's sugar in medium bowl until smooth. Discard plastic wrap and bake buns until deep golden brown and filling is melted 35 - 40 minutes. Transfer to wire rack and top buns with 1/2 cup glaze. Cool 30 minutes. Using foil overhang, lift buns from pan and top with remaining glaze. Serve. Make ahead: After transferring pieces to prepared pan in step 3, buns can be covered with plastic wrap and refrigerated for 24 hours. When ready to bake, let sit at room temperature for 1 hour. Remove plastic wrap and continue with step 4 as directed.

Thursday, June 10, 2010

Asparagus Frittata

I think I may have mentioned once or twice that David's grandmother has an asparagus bed that keeps us in delicious asparagus for a good part of the spring. We discovered that we both love roasted asparagus in the oven. It doesn't matter how much asparagus I roast at a time...we eat it all. But this spring, I decided that I should try something a little different.
So, I tried an asparagus frittata. It was so very good! I had a little trouble with it, but it was my first frittata and a learning experience. I absolutely despise runny eggs, so I think I went a little too far and cooked my eggs a little too long before popping the skillet in the oven. I ended up with a too-brown bottom. But overall, it was a success. It made a nice light Sunday night supper several weeks ago. Easy and tasty!
Asparagus Frittata
2 tsp. olive oil
1 small onion, thinly sliced
1/2 tsp. salt
1 lb. asparagus, tough ends snapped off, spears cut diagnonally into 1-inch lengths
4 large eggs, lightly beaten
1 cup shredded Gruyere or Swiss cheese
Heat olive oil into a 10-inch oven-proof frying pan over medium high heat. Add onions and salt and cook, stirring occasionally, until onions are softened, about 3 minutes. Add asparagus, reduce heat to medium-low, and cook, covered, until the asparagus are barely tender, 6 to 8 minutes. Pour in eggs and cook until almost set, but still runny on top, about 2 minutes. While cooking, preheat oven broiler.
Sprinkle cheese over eggs and put in oven to broil until cheese is melted and browned, about 3 to 4 minutes. Remove from oven with oven mitts and slide frittata onto a serving plate. Cut into wedges. Serves 4.

Tuesday, April 20, 2010

TWD: Sweet Cream Biscuits

I think that I can count on one hand the number of times I've made biscuits. We just don't eat biscuits that much around here. We love 'em though...that's for sure. Maybe that's why I don't make them! In the past, on the few occasions we've had biscuits with dinner, I've just bought the frozen ones and heated them up. (I know, I know...but they're good!) I think biscuits have a reputation as being difficult to make, so I kind of bought into it, I guess. And, being from a Southern state, a girl kind of feels obligated to make delicious, light, flaky biscuits. Well...I can't say that I've got biscuit making down to an art, but I've got a start!
Dorie (and everyone else who is good at making biscuits) will tell you that one of the keys to light, flaky biscuits is to NOT OVERWORK THE DOUGH. This is the thing I have the most trouble with in baking. I guess I just like to be stern with dough. If I get dough in my hands, I have to work it! It's a compulsion! With these biscuits, I tried not to work the dough too much. I was afraid that I had erred too far on the side of caution, but they rose pretty well. I also didn't twist my biscuit cutter when I cut my rounds. I think that helps some, too. I don't understand the chemistry of it all, but I'm pretty sure it helps the dough rise a little higher. Overall, these biscuits were very well-received at my house! David ate 5 of them. But they're teeny-tiny biscuits...cut with a 2-inch cutter. I'm not used to petite biscuits...around here, we want a biscuit the size of your fist! But I do think that these would be precious at a shower with country ham sandwiched between the two halves. YUM! If you'd like to make your own batch of super-easy and delicious biscuits, check out Melissa's blog, Love at First Bite.

Friday, January 15, 2010

Whole Wheat Oatmeal Pancake Mix

When I asked my Dad what he wanted for Christmas this year, he said, "Nothing. You and David are building a house, and I'd rather you use your money on that. [Pause] Wait, how about something homemade and delicious?" It was music to my ears! Another excuse to get in the kitchen and create! My dad is a breakfast guy. He likes cereal, of course, but he loves pancakes. I thought it would be nice to make some kind of a pancake mix that he could use to whip up a batch of delicious pancakes whenever he wanted. It just so happened that earlier that week, Melanie at My Kitchen Cafe posted a recipe for a pancake mix that she uses regularly and that her kids love. While I've never had these pancakes, just reading her description was enough to make me feel good about mixing up a batch for Dad.
The recipe makes about 10 cups of mix, which can keep for awhile (2 weeks or so) at room temperature. Or you can keep it on the fridge indefinitely, although I'm pretty sure Dad will need a refill before long. The remaining ingredients for the pancakes (besides the dry mix) are pretty typical things you'd have in your kitchen. I'm sure they'll be perfect for you if you're "breakfast people".
Whole Wheat Oatmeal Pancake Mix
3 1/2 cups rolled (quick) oats
3 cups whole wheat flour
2 cups all-purpose flour
3 tablespoons sugar
3 tablespoons baking powder
1 tablespoon salt
1 tablespoon baking soda
1 cup vegetable oil
Mix all dry ingredients together in a mixer with a paddle attachment, or by hand. With the mixer on low speed, gradually drizzle the vegetable oil in while the mixer runs. When all of the oil has been added, stop the mixer and grab a handful of the mixture. If it clumps together when you squeeze it and stays there, it's just right. If it is too crumbly to stay together, drizzle in a tablespoon of oil at a time until the mixture will stay clumped together. Store in an airtight container at room temperature for up to two weeks, or in the refrigerator or freezer indefinitely.
To make the pancakes:
Whisk together 1 cup of mix, 1 cup of buttermilk (or 1/2 cup yogurt and 1/2 cup milk will also work), and 1 egg. The mixture may seem thin, but the oats will soak up some of the moisture while your griddle heats. Heat a griddle and drop the batter onto the griddle. When the edges look dry and bubbles come to the surface but don't break, the pancakes are ready to flip.
A cup of mix will make 6 or 7 four-inch pancakes.
Related Posts Plugin for WordPress, Blogger...