Thursday, July 30, 2009

Thrifty Thursday: Make Your Own Marinade

Sometimes, I get a food idea in my head, and I can't get it out until I make it. This week, it was flank steak with a honey-lime marinade. When I went on my weekly grocery shopping excursion, I picked up a 1 1/2 lb flank steak and three limes. I didn't really know how to put together the marinade, but I didn't care. I have the Internet, so I can find anything! As I was looking around on the Internet, I saw a recipe for honey-lime chicken enchiladas that sounds delicious, so that's firmly lodged in my brain for next week. But what to do with this flank steak now? I needed a new idea for marinade, because I don't want honey-lime anything two weeks in a row.
As I wandered the Internet, I stumbled onto Simply Recipes, where I found this delicious marinade. It does include honey, but no limes. I had everything on hand to make the marinade, and the recipe promised a tender flank steak. Count me in!
I want you to look at all that juicy goodness! Flank steak can be pretty tough if you cook it to the well-done stage. David is the grillmaster of the house, but I warned him that this marinated beauty would only cook three minutes per side. He was skeptical. I think he was afraid that I was trying to kill him. His life insurance policy has been approved, you know. But like a good little husband, he obliged and brought the steak in at the appointed time (6 minutes total grill time). I let it rest for about 10 minutes (key for juicy meat), then cut the steak across the grain (another key to tender flank steak).
Doesn't it look absolutely delicious? It was. For sure. Last night, we had the flank steak with veggies and a salad. Tonight, we had the flank steak on top of salad. Delicious again. This recipe is definitely a keeper. Buy you a big ol' flank steak this weekend and treat yourself. It's really a quick, easy, and healthy dinner.
Why is this thrifty, you ask? For a couple of reasons...flank steak is a pretty reasonable cut of beef in and of itself. But it's the marinade that was the thriftiest, I thought. The ingredients are all things that I'd think most people have on hand, and I'd say that it cost pennies to prepare. Store-bought marinades aren't nearly as flavorful, I don't think, and they cost quite a bit. I've seen off-brand marinades on sale for a couple of bucks, but I'd rather have this any day of the week!
Grilled Marinated Flank Steak
1/3 cup olive oil
2 cloves garlic, minced
2 Tablespoon. red wine vinegar
1/3 cup soy sauce
1/4 cup honey
1/2 teaspoon freshly ground back pepper
2 lbs. flank steak
kosher salt
Score the surface of the steak with 1/4-inch deep knife cuts, about an inch apart, across the grain of the meat. Combine the marinade ingredients. Place steak and marinade ingredients in a large freezer bag. Coat the steak well with the marinade. Seal the bag and place in a bowl. Chill and marinade for at least two hours and up to overnight.
Using olive oil soaked onto a paper towel, coat the grill rack of your grill with olive oil. Preheat the grill with high, direct heat. The grill is hot enough when you hold your hand about an inch over it and you can only hold it there for about a second.
Take the steak out of the marinade bag and sprinkle generously on all sides with kosher salt and freshly ground black pepper (I forgot this step). The salt and pepper will help form a savory crust on the steak. Place the steak on the hot grill. If you're using a gas grill, cover the grill. Grill for 4-6 minutes on each side (we grilled for 3, because our flank steak wasn't quite 2 lbs.). Halfway through grilling on each side, turn the steak 90 degrees, so you get more grill marks.
Flank steak is best eaten medium rare; well done will make it too tough. When the steak has cooked to your preferred level of doneness, remove from the grill and place on a cutting board. Cover with aluminum foil to hold in the heat and to keep the steak from drying out, and let rest for 10 minutes.
Make very thin slices, against the grain, and at a slight diagonal so that the slices are wide. This would be great with horseradish sauce.

Wednesday, July 29, 2009

Weird.

Today at work and on the drive home, I was listening to KLOVE, and all day long, the radio personalities were talking about their favorite sandwiches. They invited callers from all over the country to call in with their favorite sandwiches. It was really interesting, especially because I love food more than anything. By the time I was on the drive home, it seemed like everyone who called in was professing their love for peanut butter and pickle sandwiches. I mean, for about 30 minutes, it was caller after caller talking about how wonderful peanut butter and pickle sandwiches are! Good grief! I was right there, nodding in agreement with the callers who said they liked peanut butter, banana, and chocolate syrup sandwiches. Or the peanut butter, banana, and honey sandwiches. But peanut butter and pickle? Please! For the better part of 14 years, Chet has been trying to get me to eat a toasted peanut butter, pickle, and mayonnaise sandwich, which he loves. I haven't taken him up on it. I love peanut butter. I love pickles. I love mayonnaise. But together? I'm not so sure. But on my drive home, I decided that today would be the day I would have my first peanut butter and pickle sandwich. I'm not quite ready to add the mayo. Baby steps, you know.
Here it is. The PB and Pickle sandwich. I used regular ol' creamy PB and these pickles. I wonder if I used enough PB? I like a thick coat of peanut butter on my sandwiches, and I kind of held back. Look at that bold pickle slice! Wow.
There you go. I did it. I took a bite. I actually at the whole thing. It was okay. It wasn't as good as I anticipated it, based on the rave reviews I heard on the radio. Maybe I didn't put enough peanut butter on it. Maybe it was because I used the cheap stuff instead of JIF. I don't know...it was edible. Maybe even pretty good. It just tasted like peanut butter and pickles. I actually found myself thinking..."maybe the mayo would be really good..."
Now I'm going to issue you a challenge, a fun one for you, and for me. Tell me your favorite sandwich, and I'll make it, blog it, and eat it. It doesn't have to be weird, like the PB and pickle sandwich, but it can be. It could be the most delicious sandwich you've ever had, and you'd like to see me try to recreate it. Please don't be mean to me and ask me to make fried worm and dirt sandwiches or something like that, because I don't want to eat that stuff. Either leave me a comment on this post, or shoot me an email at thesweetlife@insightbb.com. I can't wait to hear what you have for me!

Monday, July 27, 2009

Shrimp Couscous

If you've been wandering around The Sweet Life for very long, you probably know that I started this blog in order to participate with Tuesdays With Dorie, which is an Internet baking group. And if you've stuck around lately, you've noticed that I haven't participated in Tuesdays With Dorie for about a month. And that's because I was beginning to see my weight inch up the scale little by little. So here at The Sweet Life, David and I have been cutting back a little bit.

Generally speaking, when you think about cutting back, you probably think about eating lots of chicken, and maybe some fish. That's what we do around here...we eat a lot of chicken, but sometimes I get tired of it. Like right now. So tonight, I tried out a new shrimp recipe, which turned out to be delicious. It's not that exciting to look at, but here are a couple of pictures, anyway...
This picture turned out really bright. It looks nice...clean and healthy.
This one was taken about 12 inches away from the other photo, and look at how different the light is! This one seems a little more "moody."
Anyway...enough with the pictures. Here's the recipe!
Shrimp Couscous
1 onion, chopped
2 garlic cloves, minced
1 Tbs. olive oil
1 zucchini, chopped
1 1/2 cups chicken broth
1 tsp. thyme
1/8 tsp. red pepper flakes
1 lb. shrimp, peeled and deveined
1 cup couscous
salt & pepper, to taste
Saute onion and garlic in olive oil until soft. Add zucchini and saute about 1 minute or so. Add chicken broth, thympe, red pepper flakes, and shrimp. Bring to a boil. Add couscous; remove from heat, cover, and fluff after 5 minutes, or when broth is absorbed.

Sunday, July 26, 2009

Chicken and Onions Italiano

When it comes to my food, I get bored easily. I love to cook, and I'm a huge collector of cookbooks and recipes. I won't live long enough to make all the recipes I have earmarked in a manila folder in my kitchen, but I'm working on it! I found this recipe online last week, and I had (almost) everything on hand to make it. It was interesting...I'm not sure that I loved the large amount of cumin involved, but it was tasty, nonetheless.
It didn't take long at all to put together. Originally, the recipe called for pork tenderloin, which I had, but it was still frozen solid. I subbed chicken for the pork, and thought it was delicious.
David and I have made the switch to whole-wheat pasta. At first, it was a little chewier, but now we don't notice any difference at all. Really, I only buy whole-wheat pasta now, unless I'm making a dish for a potluck...then I go with the regular stuff.
Chicken and Onions Italiano
1 to 1.25 lb. chicken breasts, cut into bite-sized pieces
2 tsp. cumin
2 tsp. oregano
1 Tbs. olive oil
1 medium onion, cut into slices
14.5 oz Italian-style diced tomatoes
Whole wheat spaghetti or linguini
Grated parmesan
Toss chicken with cumin and oregano. Heat oil in a large nonstick skillet on medium-high heat. Add onions and chicken and cook 7-8 minutes, or until onions are softened and chicken is just pink on the center. Add tomatoes; cook until heated through. Meanwhile, cook pasta according to package directions. Drain. Top pasta with chicken-onion sauce, and top with cheese.
Serves 4

Monday, July 20, 2009

Allison's Birthday Cake


Friday was my little sister Allison's birthday. She's the beautiful bride in the picture up there. I'm the Matron of Honor. That sounds old, doesn't it? Anyway, since it was her birthday, she got to pick her birthday treat from Dorie Greenspan's cookbook Baking: From My Home to Yours. She picked the Double Apple Bundt Cake. When I read the recipe, I thought two things: "Man, that sounds delicious," and "This sounds like a fall cake." And her birthday is in July. I mean, it's got apples, apple butter, raisins, walnuts, cinnamon, nutmeg, and ginger. It doesn't get more fall-like than that. But it was Allison's birthday, and by golly, if she wanted a fall cake she was gonna get it!
But listen to this. First, let me preface this by telling you that Kentucky in the summer is three words: HAZY, HOT, and HUMID. But this past weekend, we had the most delightful, cool weather you could imagine. It was about 70 degrees on Saturday and about 72 on Sunday! Woo Hoo! It felt like fall all weekend. The perfect time for a double-apple bundt cake! And didn't it turn out nicely? Allison made two requests: no nuts and no icing. She just wanted a dusting of powdered sugar. She's a nice, simple girl...like me! I think we're all pretty much simple folk, the Bickerses, Orrs, and Lawrences. She did get some good natured ribbing from Larry, Chet, and David about the absence of icing. As Mom and I were cutting and plating the cake, we heard her say, "WHEN IT'S YA'LL'S BIRTHDAYS, YOU CAN HAVE ICING!" She cracks me up. I love that girl.
The cake was absolutely fantastic. It was super-moist, and the apple flavor was perfect. It also came together incredibly easy, so it will definitely go into the rotation this fall. I usually have all the ingredients on hand to make it, too...that's always a huge bonus. Here's the recipe for you to file away for the first crisp, cool day of fall. Hopefully Dorie won't whip me for posting her recipe:
Double Apple Bundt Cake
Dorie Greenspan
For the Cake:
2 cups all-purpose flour
2 tsp. baking powder
1/2 tsp. baking soda
1/2 tsp. ground cinnamon
1/4 tsp. freshly grated nutmeg
1/4 tsp. ground ginger
1/4 tsp. salt
1 1/4 sticks (10 Tbs.) unsalted butter, at room temperature
2 large eggs
1 cup store-bought apple butter, spiced or plain (I used homemade that I've been hoarding for a while)
2 medium Braeburn apples, peeled, cored, and grated
1 cup pecans or walnuts, chopped
1/2 cup plump, moist raising (dark or golden...I used golden)
Confectioner's sugar, for dusting (optional)
For the Icing (Optional)
1/3 cup confectioner's sugar
About 2 Tbs. fresh orange or lemon juice
Getting Ready: Center a rack in the oven and preheat the oven to 350 degrees. Butter a 9- to 10-inch (12 cup) Bundt pan. If your pan is not nonstick, dust the interior of the pan with flour, then tap out the excess. Don't place the pan on a baking sheet--you want the oven's heat to circulate through the Bundt's inner tube.
Whisk together the flour, baking powder, baking soda, and spices.
Working with a stand mixer, preferably fitted with a paddle attachment, or with a hand mixer in a large bowl, beat the butter and sugar on medium speed, scraping the bowl as needed, for 3 minutes, or until the mixture is smooth, thick, and pale. Add the eggs one at a time, beating for about 1 minute after each addition; you'll have a light, fluffy batter. Reduce the mixer speed to low and beat in the apple butter--don't worry if it curdles the batter. Still on low, add the grated apples and mix completely to blend. Add the dry ingredients, mixing only unil they disappear into the batter. Using a rubber spatula, fold in the nuts and raisins. Turn the batter into the Bundt pan and smooth the top of the batter with the rubber spatula.
Bake for 50 to 55 minutes, or until a thin knife inserted deep into the center of the cake comes out clean.
Transfer the pan to a rack to cool for 5 minutes before unmolding and uncooling the cake to room temperature. If possible, once the cake is completely cool, wrap well in plastic and let it stand overnight at room temperature to ripen the flavors.
If you're not going to ice the cake, you can dust it with confectioner's sugar just before serving.
To make the optional icing: Put the sugar in a small bowl an dstir in a squirt or two of either orange or lemon juice. Keep adding the juice a little at a time until you have an icing that falls easily from the tip of a spoon. Drizzle the icing over the top of the cake, letting it slide down the curves of the cake in whatever pattern it makes. Let the cake stand until the icing dries, a matter of minutes, before slicing.

Saturday, July 18, 2009

Making Plans...

Last year, Shirley's garden was overrun with zucchini, and she had a bumper crop of blackberries. I took a bunch of the HUGE zucchini and shredded them up to freeze for future use. I did the same with blackberries. My family proceeded to make fun of me, because I had something like 36 cups of zucchini and 24 cups of blackberries. Well...it's gone! I've used it all up on things like blackberry cobbler, zucchini bread, and blackberry pie bars, so it's time to stock up. Here's what I did yesterday:

This year, I got smart. After I rinsed the blackberries, I laid them out on towels for an hour or so, then I spread them onto a waxed paper-lined cookie sheet and stuck them in the freezer overnight. This morning, I had individually frozen blackberries. Much more efficient than one big hunk 'o frozen blackberries. Right now, I'm at about 16 cups of blackberries. I heard this morning that there are more ripe and ready for the pickin'!
After shredding about 5 super-huge zucchini, this was what I had...

And then after squeezing most of the water out of it and packing it into four-cup portions, this is what I had...
Now, I've got a head start on my Christmas baking (little loaves of zucchini bread are always well-received), and I'll be able to make some more of those divine blackberry pie bars.

Thursday, July 16, 2009

Please Excuse the Construction...

Sorry, guys. The Sweet Life is going through some construction right now, and with being at VBS every night, I just haven't gotten it finished. Hopefully it won't continue to be a wreck after this weekend...

Monday, July 13, 2009

Just So Ya Know...

Well...tonight is the first night of Vacation Bible School in the metropolis of Sulphur, Kentucky. Therefore, The Sweet Life will probably be on hiatus for the majority of the week. I promise I'll be back soon though...hopefully by the weekend! Don't forget about me!

Saturday, July 11, 2009

Banana Split Cake

Today, David's mom and dad had a little birthday party for David's Uncle Eddie. Eddie loves to play volleyball, so Earl, Shirley, and David organized a volleyball game for him. David asked me if I would mind to make a birthday cake. Would I mind to make a birthday cake?! Apparently, David forgot who he was married to! Of course I'd make a birthday cake. But David asked me one more question: Can you make it look like a cow? You see, Eddie is a dairy farmer. I did what I could. I made it white with black spots. It's a little more like a Dalmation than a Holstein, but it was the best I could do. I decided on a Banana Split Cake, which is one of my favorite cakes to make. It's easy and delicious. You've seen the outside...let me show you what's inside this cake:Oh, yes it is. Strawberries and Cool-Whip. Yum. I'm telling you, this cake is so easy it's ridiculous. And the taste? Even ridiculouser (if that was a real word). It's got all the flavors of a banana split...banana, strawberry, pineapple, hot fudge...even a cherry on top!
Banana Split Cake
Blue Hyacinth (from Recipezaar)
1 pkg. yellow cake mix
1 pkg. instant banana pudding mix
1 1/2 cups water
1/3 cup vegetable oil
3 eggs
8 oz. can crushed pineapple, drained
8 oz. Cool-Whip, thawed and divided
10 oz. frozen strawberries, thawed and drained
1/4 cup hot fudge, warmed
maraschino cherries
2 Tbs. chopped walnuts, optional (I left these out because some folks are funny about nuts)
Preheat oven to 350 degrees. Coat two 8-inch round cake pans with Baker's Joy, or grease and flour them.
In a large bowl, with an electric mixer on medium speed, beat the cake mix, pudding mix, water, oil, and eggs until smooth.
Stir in pineapple and then pour the batter into the cake pans, dividing equally.
Bake for 35-40 minutes, or until a wooden toothpick inserted in the center comes out clean.
Allow to cool for 15 minutes, then invert onto wire racks to cool completely.
In a small bowl, combine 3/4 cup Cool-Whip and the strawberries and mix well.
Place one cake layer on a serving plate and frost the top with the strawberry mixture.
Place the second layer over the first, then frost the top and sides with the remaining whipped topping.
Drizzle with hot fudge sauce (make sure the hot fudge is just warm enough to become pourable or pipeable...if it's too hot it will "melt" your frosting), then place the cherries around the edges of the cake and sprinkle evenly with the nuts.
Serve immediately, or cover and chill until ready to serve.
It turned out much nicer than I thought it would, what with trying to pipe hot fudge and all. However, it's not quite the cake you want to have sitting out in 85-degree heat...it kind of starts to melt on you. Just make sure you keep it refrigerated, and it'll be okay!

Thursday, July 9, 2009

Thrifty Thursday: Homemade Take 'n Bake Cookies

Next week is Bible School, and of course, we've got to feed the kiddos. I volunteered to provide the snack for three nights of the week. (Our Bible School is small...we're expecting about 50 mouths to feed...that includes the kids and the volunteers.) I needed something I could make ahead and that would make a large quantity, and that could be cooked quickly. This was one of the options I came up with...chocolate chip cookies.

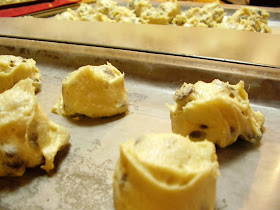
I won't have time to actually bake the cookies before Bible School, because of my crazy work schedule, but I decided that homemade "Take 'n Bake" cookies would work well. Tonight, I made almost 5 dozen cookies, and they're now in David's grandmother's upright freezer, flash-freezing.
That way, they'll all freeze individually, then I can just pop them in a big Ziplock bag and they won't stick together. Devona (the Bible School Snack Czar) can pull them out, stick them on a cookie sheet, and bake them while the kiddos are in class. Then, right before they leave, they can have a warm chocolate chip cookie! I don't buy the "real" Take 'n Bake cookies, because I just like to bake, but I know they're pretty pricey. I think they're about $3.50 for a dozen. I bet I made all 5 dozen of my cookies for that price. Pretty thrifty! I think this is a great idea for a quick dessert to have on hand in your freezer...you know, for those times when you have company stop by unexpectedly, or even more importantly, when you have an attack of the sweet tooth! I've thought many times that I need to make several batches of Dorie's pie crust, just to keep in the freezer. I haven't done it yet, but it's on my to-do list!

Tuesday, July 7, 2009

Dinner In a Hurry/Healthy Makeover: Quesadillas

Sorry guys...no Tribute to Katherine Hepburn Brownies today. This chickie is starting to get chunky, so we've got to lay off the sweets for a little bit. Thank goodness the TWD rules have been loosened up for the summer!

One night last week, in order to make use of some of the leftovers that were taking over our fridge, David and I had quesadillas. There are two things I really like about quesadillas: they're quick and easy to prepare, and you can lighten them up pretty easily without compromising flavor.
I made them in a cast-iron skillet, which is definitely the way to go. Before assembling the quesadillas, I very lightly coated one side of the tortillas with canola oil with a pastry brush. That side went down in the dry skillet, just until bubbles started to form. While the first side was browning, I brushed the other side. By the time I brushed the second side, the tortilla was ready to flip. When both sides were nicely browned, I filled the quesadillas with fat-free refried beans (YUM!), taco meat, 2% milk shredded Mexican cheese, onion, and black olives. I just filled one side and then folded the other side over, omlette-style.
I gave them a light press on each side, just to be sure that they got nice and toasty. I served them on a bed of shredded lettuce and topped them with salsa and reduced-fat sour cream. They were absolutely delicious, and they were a lighter version of a potentially high-fat, high-calorie meal.You can fill your quesadillas with absolutely anything you want. I'm thinking about trying to make some buffalo chicken quesadillas sometime before too long. Mmmm... What ideas do you have for quesadillas?

Monday, July 6, 2009

Peaches and Cream Muffins

One day last week, Shirley gave me some fresh peaches from Bray's Orchard in Bedford, KY. They were gorgeous, and they smelled sooo gooood. I chopped them all up and had plans for two things: Peaches and Cream Muffins and peaches with vanilla ice cream. I don't remember where I got this recipe, but rest assured I didn't create it. I can copy anything, but I don't have an original thought in my head. I'm sorry I can't give credit where credit is due. I love this recipe, because it's so versatile. You can use just about any kind of fruit. I've made strawberries and cream muffins (but you can't use frozen strawberries), and I'd love to have some blueberries and cream muffins, if blueberries weren't so darn expensive. Blackberries will be ripe in a week or so, so I'll probably make some blackberries and cream muffins too. The possibilities are endless!
Peaches and Cream Muffins
1 3/4 cups all purpose flour
1/2 tsp. baking powder
1/4 tsp. baking soda
1/4 tsp. salt
1/2 tsp. cinnamon
1/2 cup butter, softened
3/4 cup sugar
1/4 cup light brown sugar
2 whole eggs, room temperature
1/2 cup sour cream, room temperature
2 tsp. vanilla
1 1/4 cup fresh peaches, coarsley chopped
3/4 cup chopped walnuts, optional
Combine flour, baking soda, baking powder, salt, and cinnamon; set aside.
In a small bowl, beat butter until creamy. Gradually add sugar, beat one minute until light and airy. Add brown sugar. Beat in eggs, one at at a time. Beat in sour cream and vanilla.
Stir into flour mixture only until dry ingredients are moistened.
Fold in peaches and nuts.
Pour into muffin tins. Bake at 350 degrees for 20-22 minutes, rotating once during baking. Cool, and enjoy!
(You can make this into one loaf of bread, baked in a 8x4-inch loaf pan. Bake for 60-65 minutes.)
Yields 18 regular-sized muffins.

Saturday, July 4, 2009

Happy 4th of July!

Happy Independence Day, ya'll! I hope your day has been full of family, friends, food, and fun. Here in Kentucky, it's been raining pretty much all day, but that hasn't stopped the fireworks or the barbeques! David and I went over to my sister and brother-in-law's house to hang out with them for awhile. We had a great time...hotdogs, baked beans, scalloped potatoes, and ice cream for dinner/dessert, games, and fireworks. Earlier this week, I wanted to make something a little patriotic to celebrate today, but it didn't turn out exactly as I had hoped.
These were supposed to be red, white, and blue cookies. They're sugar cookies with dried cherries, blueberries, and white chocolate chips. Except the cherries looked just like blueberries...really dark blue. And the white chocolate chips didn't really show up that well. But they sure were good! I started the recipe with this sugar cookie recipe that I found at Joy the Baker's website. Then I just added in the goodies until the proportions looked right.
Vanilla Sugar Cookies with Blueberries, Cherries, and White Chocolate Chips
adapted from a recipe by The Pastry Queen
1/2 cup (1 stick) unsalted butter, at room temperature
1/2 cup vegetable oil, such as canola or sunflower oil
1/2 cup granulated sugar, plus additional for sugaring tops
1/2 cup powdered sugar
1 large egg
2 teaspoons vanilla extract, or the seeds of 1 vanilla bean
2 cups all-purpose flour
1/2 teaspoon baking soda
1/4 teaspoon salt
4 oz. dried blueberries
6 oz. dried cherries
4-6 oz. white chocolate chips
Preheat the oven to 350 degrees F. Line baking sheet with parchment paper, or foil, or grease generously with butter or cooking spray.
Using a mixer fitted with a paddle attachment, beat the butter in a large bowl on medium speed for about 1 minute. Add the vegetable oil. It may not fully incorporate with the butter, but that’s ok. Add the granulated sugar, powdered sugar, egg and vanilla, beating on medium speed until each ingredient is completely incorporated.
Stir in the flour, baking soda and salt all at once using a wooden spoon or the mixer set on low. Add the blueberries, cherries, and white chocolate chips. Mix just until incorporated. The dough will be soft.
Refrigerate the dough for 1 hour or freeze for 15 minutes just so it’s easier to handle.
For large cookies, dollop 2 Tablespoons of cookie dough onto the cookie sheet about 2 inches apart. For smaller cookies use 1 Tablespoon for each cookie. Press the dough evenly with your fingers or palm to 1/4-inch thickness. Generously sprinkle sugar on top of the cookie dough.
Bake for 12 to 14 minutes for larger cookies or 8 to 10 minutes for smaller cookies. Let the cookies cool on the baking sheet for at least 10 minutes before transferring to racks to cool completely. The cookies will keep for up to 3 days if stored in an airtight container.

Thursday, July 2, 2009

Roasted Veggies

It's that time of year again...one of my favorite times of the year. Gardens all over the place are beginning to burst at the seams with fresh produce. My mother-in-law's garden is no exception. She saves me so much money during the summer on veggies and blackberries! This week, we came home with a ton of new potatoes, yellowneck squash, zucchini, and fresh green beans. There were enough green beans for a family of 12, at least. There are only two of us! What in the heck was I going to do with green beans? About a year or so ago, I discovered that I love to roast vegetables (especially asparagus). I've roasted just about everything, and I've never had a bad result. But I had never roasted green beans.
Oh.My.Word. I'm in love. I think they've taken my number one roasted veggie spot from asparagus. They were so simple and quick to prepare, but they taste like a million bucks! (At least in my humble opinion.) We've had them two nights this week. And I still have more fresh green beans in the fridge waiting their turn in the 450-degree oven.
I also roasted some of Shirley's yellowneck squash tonight. Before roasting it, I sprinkled some dry Italian dressing mix on them. I love the flavor of the Italian seasoning with the squash. Delish!
Roasted Green Beans
fresh green beans (as many as you like)
4-5 tsp. extra virgin olive oil
kosher salt
fresh ground black pepper
Preheat oven to 450 degrees. Spray a large baking sheet with cooking spray. In a large bowl, lightly coat the green beans with the extra virgin olive oil. Mix thoroughly, making sure all the green beans are coated very lightly with the olive oil. Spread out the green beans on the sheet pan, making sure to have a single layer of green beans. Sprinkle with the kosher salt and black pepper. Roast for about 12-15 minutes, stirring once. Most of your green beans should have some brown, blistery looking spots on them. That's good...and tasty!