Monday, February 28, 2011

Menu Plan Monday

This week, I'm going to try something new...to the blog anyway, not to me. When David and I got married, I did not have any plan when it came to putting together meals during the week. That resulted in multiple grocery trips per week, and our eating an insane amount of pasta. I got really tired of going to the grocery umpteen times per week, and the pasta diet led to some weight gain, so I decided we had to do something about it. So...I joined Weight Watchers about 2 years ago and started planning our meals for the week. It made such a difference to know on Sunday afternoon what we'd be having for the entire week. Now, it's a routine. On Sunday afternoons, I get out the Kroger ad, cut coupons, look through cookbooks and blogs, plan my menu, and go to the grocery. It is a little more work up front, but it makes answering the "What's for dinner?" question so much easier to answer. I write the week's menu on an index card, post it on the fridge, and there are no more nights where I just stare at the fridge and wonder what we're going to eat!
A couple of weeks ago, I was reading Amanda's Cookin' and noticed that she's participating in Menu Plan Mondays, which is hosted by Laura at I'm an Organizing Junkie. I thought I'd join in on the fun! Here's what we'll be having this week:

Monday: Nothing planned. David and I (along with my mom) will be attending an Infant CPR class, so we'll grab something on our way there.
Tuesday: Pork tenderloin with mustard sauce; steamed broccoli as a side.
Wednesday: Leftovers for me; David will be with our church's pastor search committee conducting an interview, so he'll have dinner there.
Thursday: Grilled or baked Ranch chicken with steamed veggie medley.
Friday: Hamburgers for David, a veggie burger for me; oven roasted potatoes as a side.
Saturday: Our church's annual soup supper, so we'll be eating there.
Sunday: Leftovers/forage in the fridge (we eat a BIG meal on Sunday afternoons with my parents, so Sunday nights we don't usually have an organized meal).

Friday, February 25, 2011

The Bread of Life Cafe: A Review

I've probably only mentioned this a million times on the blog so far, but here I go again. For five wonderful years, I attended Lindsey Wilson College, a small, liberal arts school that's located in Columbia, Kentucky and is affiliated with the United Methodist Church. I also worked there for about 2 years after graduation as a full-time faculty advisor to freshman at risk for dropping out of school. I left LWC for about 3 1/2 years, but was luckily able to go back to work for them when their School of Professional Counseling opened a community campus in Louisville, Kentucky. The vast majority of you probably have no clue where Columbia, Kentucky is, and that's okay. It's in the middle of nowhere. Southcentral Kentucky, to be exact. And it's a geographical oddity...about 2 hours from everywhere. Anyway, it's not a metropolis by any means. There aren't very many restaurants (although Fiesta Mexico is delicous!), and the only chains are fast-food. What I'm trying to say is this: you can exhaust your new dining opportunities fairly quickly in such a small town. That's what initially led a group of coworkers to The Bread of Life Cafe in Liberty, Kentucky one afternoon. Liberty is another very small town (smaller than Columbia!) and is home to a large Mennonite and Amish community.
The Galilean Children's Home was founded in 1986 by Jerry and Sandy Tucker, and they are "a non-profit organization that cares for children all over the world that have been abused, neglected, rejected, are in need of medical treatment, or have been placed here for a Christian education." In one of their newsletters, I read that their monthly operating costs are roughly $200,000, and they get no federa or state funding. Their operations run solely on donations and fundraisers. You can imagine what a daunting task this would be, especially in a very rural area. One of their projects, which helps fund the Home, is the Bread of Life Cafe.
The Bread of Life Cafe is, without question, one of my favorite places to eat. If you visit, I think you'll be reminded of Cracker Barrel, but you'll be much more impressed. As you walk in the front doors, you enter a large gift shop, which carries a wide assortment of nice things. You'll find monogrammed everything (key chains, travel mugs, notebooks, etc.), purses, home decor, and baby items. They also have a fudge shop (!) and they also sell fresh-made breads and noodles.
Once you make your way through the gift shop, you'll find yourself in the restaurant, which has lots of seating. It's a very comfortable, homey atmosphere. There are displays of home goods/decor all over the restaurant, as well as beautiful framed prints. All of the tables are the type that you'd find in your kitchen or dining room at home.
The food is country-style comfort food, and they have a nice menu. It's got plenty of variety, but it's not so exhaustive that you can't make up your mind about what to have. In the past, at lunch, I've gotten the club sandwich, which is both delicious and HUGE. But usually, we go for the buffet. About two weeks ago, David and I took his mom and dad to Liberty for lunch at the Bread of Life and then on to shop at some local Amish stores (furniture, dry goods, grocery, etc.). Of course, we opted for the buffet and weren't disappointed. They have an extensive salad bar, with all of the fixin's you could want. On the day we visited, the buffet had barbeque pork chops (delicious!), baked fish, and roast beef (which was very tender, according to my father-in-law) as entrees. Sides included beets, corn, green beans, scalloped potatoes, and several other things I can't remember right now. They also always have cornbread and rolls on the buffet. The rolls alone are worth visiting for:
See that plate between me and David? That's one roll. My roll, to be exact. I didn't share it. I ate it all, and I could have eaten at least one more, but I didn't want to be a glutton. They are light and fluffy, and golden with melted butter. Heavenly, I tell you. After you've had your fill
of what the buffet has to offer, you can try one of two desserts available buffet-style (on this trip, it was a white cake with icing, or strawberry crumble) and/or an ice cream sundae from the soft-serve ice cream station. It should come as no surprise that they nearly had to roll us out the front door after all we'd eaten. And all of this is only $9.99 per person (salad bar, unlimited rolls, and buffet, including dessert). The food is high-quality, prepared with care, and is absolutely delicious.
If you find yourself in Southcentral Kentucky anytime soon, please stop by the Bread of Life Cafe. You can reach them at 606.787.6110. They're open Monday - Thursday from 10am - 8pm, Friday - Saturday from 10am - 9pm, and closed on Sunday. If you'd like to see more pictures of the Bread of Life Cafe (including construction), visit them here. For more information about the Galilean Children's Home and their other projects, click here.

Wednesday, February 23, 2011

Cranberry White Chocolate Chip Cookies

One of the best things about loving to bake is this: you get a craving for something sweet, rummage through your pantry, and find the supplies to make wonderfully delicious cookies, which are warm and gooey from the oven in about 30 minutes. One of the worst things about loving to bake: you get a craving for something sweet, rummage through your pantry, and find the supplies to make wonderfully delicious cookies, which are warm and gooey from the oven in about 30 minutes. It works both ways, you see. I love being able to whip up something tasty in just a few minutes, but lots of times it's just too easy to do that whenever I get a craving. Which happens a lot. Like a few weeks ago, I decided I really wanted some cookies, so I found this recipe on the Internet. Did I need these cookies? Absolutely not. But I had all the ingredients...so why not?
If you're a fan of cranberries and white chocolate you will love these cookies. Of course, they're much better when they're still warm, but once they're cool, they're nice and chewy. (I love a chewy cookie...crispy ones, not so much.)

Cranbery White Chocolate Chop Cookies
1 1/4 cup all-purpose flour
1/2 tsp. baking powder
1/2 tsp. baking soda
1/4 tsp. salt
1/2 cup unsalted butter, at room temperature
1/2 cup light brown suagar
1/2 cup granulated sugar
1 egg
1 tsp. vanilla extract
1 cup old-fashioned rolled oats
1 cup white chocolate chips
1 cup dried cranberries
Preheat oven to 375 degrees. Line two baking sheets with parchment paper or a silicone baking mat; set aside.
In a medium bowl whisk together the flour, baking powder, bakind soda, and salt. Set aside.
In the bowl of a stand mixer, cream the butter and both sugards together until light and fluffy, about 3 minutes. Add the egg and the vanilla extract and mix until well combined. Reduce the mixer speed to low and gradually add the flour mixture, mixing until just incorporated. Using a rubber spatula, stir in the oats, the white chocolate chips, and the dried cranberries.
Roll dough into balls - about 2 tablespoons of dough per cookie - and place on the prepared baking sheets. Flatten the tops slightly with your fingers. Bake until teh cookies turn slightly golder, about 10 minutes. Remove from the oven and let cool on the baking sheet for 2 minutes. Transfer to a wire rack until completely cool. Store in an airtight container at room temperature.

Monday, February 21, 2011

Stuffed Peppers

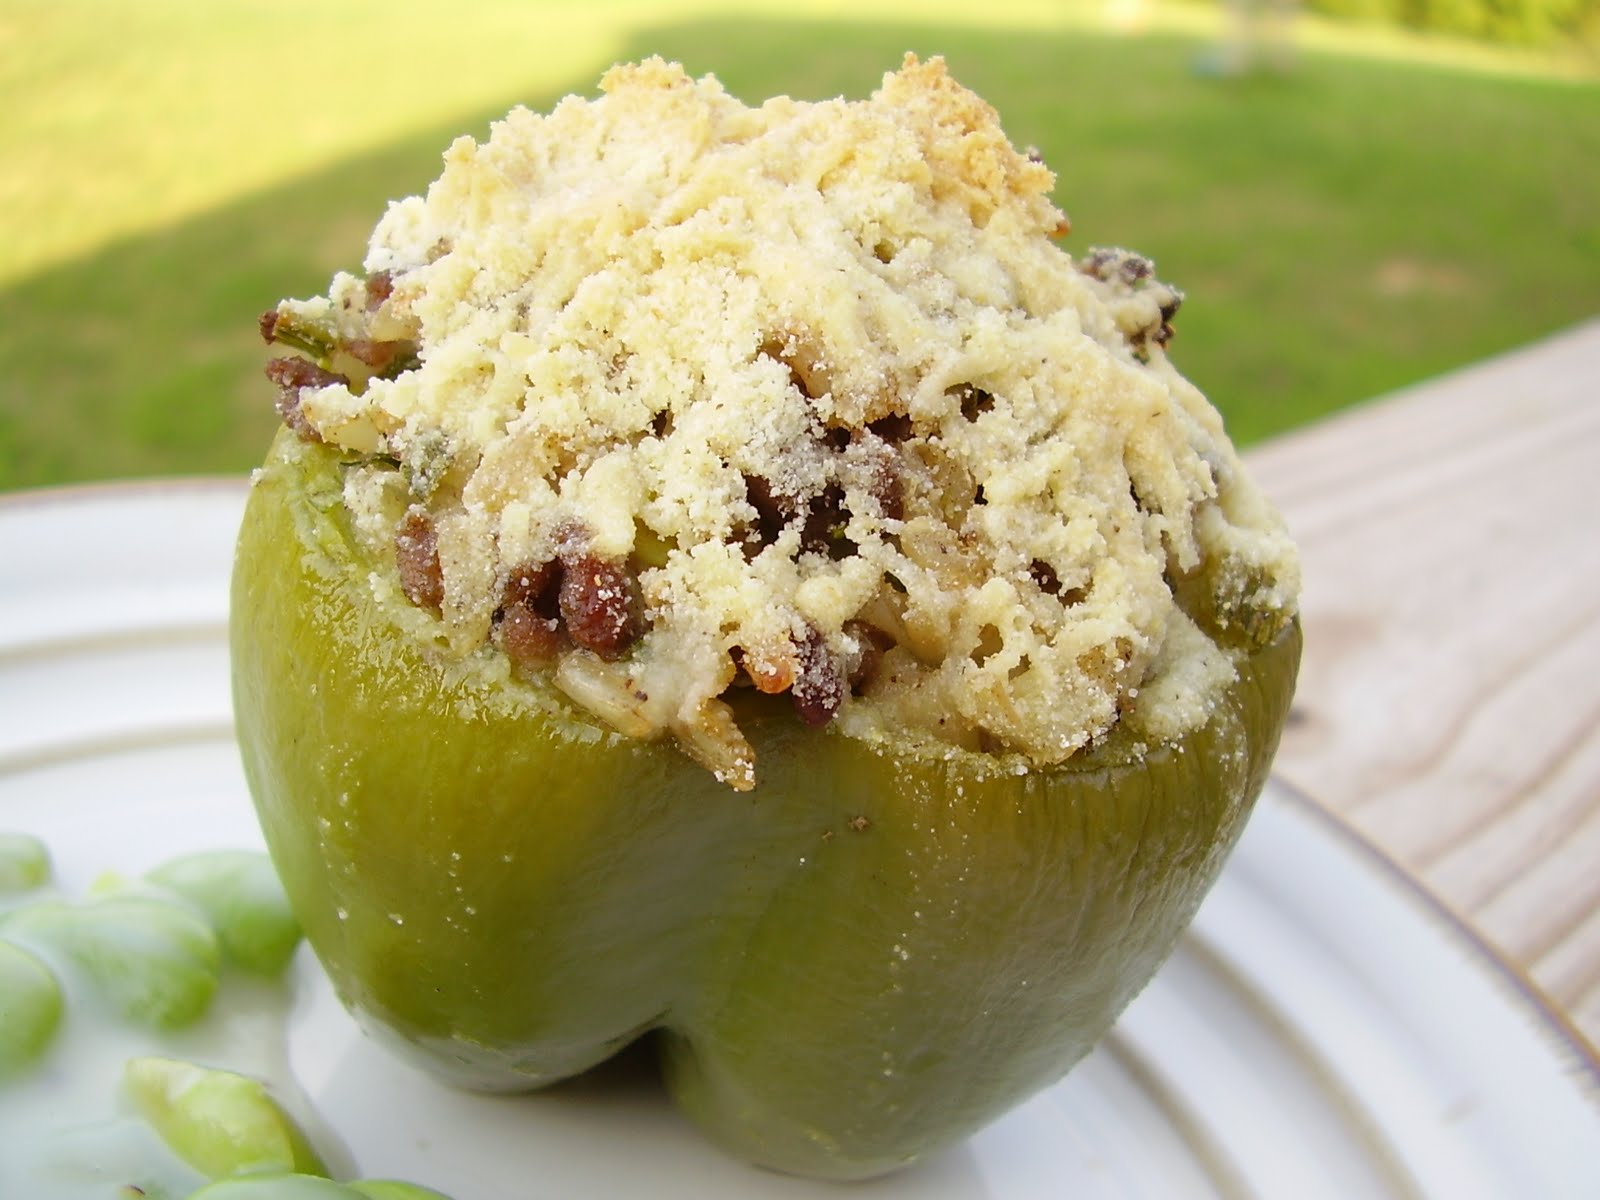
We never once had stuffed peppers for dinner when I was growing up. Never. Ever. The first time I ever saw a stuffed pepper was in the college dining center, and lots of friends commented on how much they dreaded it when their moms announced that they'd be having stuffed peppers for dinner. So...I'm not exactly sure what posessed me to try stuffed peppers in the first place! We've had them several times (one version is posted here), and this is my favorite recipe. I like that this one doesn't have any tomatoes, and I love the cornmeal topping!

This meal is really quite simple to put together, but there's a lot of preparation involved, most of which is chopping. (And by the way, if you have a good, sharp knife, it makes prep time a lot less tedious! Always remember, a dull knife is a dangerous knife.) There's also rice to prepare. What I'm telling you is this: this is not a quick meal to throw together. Don't even attempt it on a night that you're super-busy or super-tired. Save it for a day when you have plenty of time, and it will be well worth it. The leftovers heat up beautifully, and lots of times I have filling left over. When that happens, I portion it into ramekins, add the cornmeal topping, and bake. That way I have little pre-portioned lunches to just grab out of the fridge. And a bonus: it's healthy, too!

Stuffed Peppers
Adapted slightly from Heather's Website
4 medium green bell peppers
8 oz. lean ground beef
1 1/2 cup chopped onion
1/2 cup chopped celery
2 tsp. minced garlic
1 1/2 cup cooked brown rice
1/2 tsp. salt, plus more for seasoning
1/4 tsp. freshly ground black pepper, plus more for seasoning
1/2 tsp Greek seasoning (I use Cavender's)
1/4 cup chopped green onions (I use the whole thing)
1 tbs. chopped parsley leaves
2 tbs. plain cornmeal
2 tbs. grated parmesan
4 tsp. canola oil
Preheat the oven to 400 degrees. Cook brown rice.
Cut off the top quarter of each bell pepper and reserve. Scoop the seeds and veins out from the inside of each pepper and discard. Set bell pepper shells aside. Removed and discard the stems from each bell pepper top. Dice enough of the bell pepper tops to make 1/2 cup. Set aside.
In a large skillet, over medium-high heat, brown the ground beef until cooked through, about 4 minutes. Add the onions, 1/2 cup diced bell pepper, and celery. Saute for 4 minutes, or until the vegetables are soft. Add the garlic and cook, stirring, for 1 minute. Add the rice and mix well. Season with salt, pepper, and Greek seasoning. Cook for about 1 imnute. Remove from the heat and stir in the green onions and parsley. Season the insides of each bell pepper shell with salt and pepper, to taste. Spoon the rice mixutre into the bell peppers.
In a small bowl, combine the cornmeal and cheese. Season with a pinch of Greek seasoning and mix well. Sprinkle the crust over each pepper. Top each crust with 1 tsp. of canola oil and place the peppers into an 8-inch baking dish or pan. Add just enough water to cover the bottom, about 1/3 cup. Bake for 25-30 inutes, or until the tops are crust and brown and the filling is warmed through. Serve hot.

Friday, October 29, 2010

Peach Cobbler

I've done a pretty horrible job of keeping up with the blog lately. Honestly, I've just lost interest in it. I think I've gotten lazy. I still enjoy cooking, but I've gotten to where I don't want to upload pictures to my computer, then fight with Blogger to get them inserted into the posts. But I'm going to try to keep it up a little better (I know, I know...how many times have I said that lately?). I was looking through my pictures, and I've got a pretty serious backlog of food pictures, which is good, because these days by the time I get dinner ready, all of the natural light is gone. I found this picture of a peach crisp I made this summer, and it reminded me of just how delicious it was:
This summer, my mother-in-law brought me some fresh peaches from the Henry County Harvest Showcase. My father-in-law really wanted some more peach shortcakes, but I was more interested in a peach cobbler. Besides, I had a new cookbook that I wanted to use! This recipe comes from the Cooking for a Cure cookbook that was created by the Dillsburg (PA) Relay for Life, Team Lollipop. David's aunt and two cousins have tons of recipes in the cookbook, but this wasn't one of their recipes. (Sorry Aunt Mary! We'll try more soon!) Anyway, the peaches were perfect, and this crisp was delicious. I'm certainly aware that there are probably very few (if any) people who can get a fresh peach this time of year, but I don't see why frozen peaches wouldn't work.
Peach Crisp
Kim Walden
4 cups sliced peaches
2/3 cup brown sugar, packed
1/2 cup flour
1/2 cup oats
3/4 teaspoon cinnamon
3/4 teaspoon nutmeg
1/3 cup butter, softened
whipped topping or ice ream
Spray an 8x8 square baking pan with cooking spray. Arrange peaches in pan. Mix together brown sugar, flour, oats, cinnamon, nutmeg, and butter; sprinkle over peaches. Bake in 375 degree oven for about 30 minutes. Serve warm with whipped topping or ice cream.

Thursday, October 21, 2010

Four Years

I can distinctly remember sitting in one of my Marriage & Family classes in my graduate program several years ago. One of my favorite (and best) instructors, Dr. Brenda Dew, was telling us about recent research that revealed that couples were more likely to hit serious rough patches and/or file for divorce in odd years of their marriage than in even years. At the time, I thought it was a load of crap. Now that we're celebrating our fourth year of marriage, I have to wonder if maybe there's more than a little truth in that.
Please don't get me wrong...David and I have a very happy marriage and we're devoted to one another, but this year has been tough! Over the course of our third year of marriage, we built a house, moved in, lost our first baby to a miscarriage, watched close family members struggle with some tough stuff, and made it through our September "due date" with the baby that we didn't get to have. And through all of that, there have been some really tough, dark times. Thankfully, somehow, during all of that, I recognized that the way we handle those situations together would make us or break us. There were times when for some reason, my first instinct was to snap at him or take out my frustrations, anger, and fears on him (and I probably did, to some degree), but I did my best to choose not do those things. Instead, we leaned on each other, our families, friends, and our God, and we've made it through. Things are looking great for our fouth year of marriage...in fact, we just got back from a week-long cruise vacation (which was much needed!) in order to kind of hit the "reset" button. Through it all, I can truly say that life is good, and I couldn't imagine spending my life with anyone besides David. He is an amazing husband, and I look forward to sharing the rest of life's ups and downs with him. Love you, David!

Tuesday, September 28, 2010

Craft Project: Decorative Letters

We moved into our new house in January of this year, and we haven't really done a very good job of getting the place decorated. More than once, David was ready to hang pictures, but I couldn't go through with it...I just couldn't bear to put the holes in the walls! I'm having a hard time committing to the placement of pictures. But strangely enough, I don't have too much of a problem with hanging "stuff" on my walls. Right now, just about the only two decorative things we have hanging in our house are a tobacco basket and an old wooden ladder from my grandfather's farm (which led one of my colleagues to say that I'm going with the "Cracker Barrel" approach to decorating). Anyway, the ladder was the springboard for this whole craft. The ladder is hanging horizontally over the entrance to our kitchen/breakfast room, but it was a little bare. I knew that it needed something extra, and then I thought about the decorative letters I'd seen all over the web. Here's what I did:
I bought some large, chipboard letters from Michael's and painted them all a cream color. (I realize that it might be hard to figure out what the heck I plan on spelling. I had intended to spell HOME. However, Michael's did not have an M that day, so I got the letters to spell LOVE along with the H. Hopefully Michael's will have the M next time I go back.)
Then, I gathered my scrapbook paper and traced my letters. It's very important to actually do the tracing on the side that you don't want showing. Also be sure you trace the letter backward!
Here are cut out scrapbook letters! As you can see, they're all turned the right way. That's because I traced the letters backward! Now I'm ready to apply the scrapbook paper to the chipboard letters. Sorry I don't have any pictures of that step, but it's pretty self-explanatory. I used Mod Podge to glue the paper to the letters, but looking back, I'd use spray adhesive instead. The Mod Podge was a little messy to work with, and the paper wanted to wrinkle.
After the letters dried, I put them in the "frames" of my letters, and here's the finished product! In this picture, you can see the whole ladder.
And here, you can see the letters a bit better. Once I finally get my M, it'll only be a matter of changing two letters to make HOME. And, if you think about it, I can cover the reverse of the HOME letters pretty easily with other papers for Christmas! This was such a quick, easy project, and it makes such a difference!
Related Posts Plugin for WordPress, Blogger...